Last modification on
\n\tusmb is a program to mount SMB shares from userland via FUSE.\nUnder-the-hood it uses Samba and exposes the network share as a regular local filesystem.\nPrograms can just access the filesystem and for example do not need to add code for SMB support or link against Samba.\nIt is more convenient than scripting around smbclient in some cases.
\nsmbclient(1): https://www.samba.org/samba/docs/current/man-html/smbclient.1.html
susmb is a fork of usmb from 2013-02-04.\nhttp://repo.or.cz/w/usmb.git/snapshot/aa94e132c12faf1a00f547ea4a96b5728612dea6.tar.gz\n(git commit aa94e132c12faf1a00f547ea4a96b5728612dea6)
\nusmb has been unmaintained since 2013. Sometimes programs are finished and so\nbeing unmaintained is not so bad. I think the general idea of the code was good\nand it is still a useful program for some systems, probably mostly BSD systems.\nLinux has a SMB/CIFS driver anyway.
\nThe two main reasons I forked usmb were performance issues with it on OpenBSD\n(because of hardcoded options and assumptions for FUSE for Linux) and issues by\nusing it in non-interactive mode.
\ngit clone git://git.codemadness.org/susmb\nYou can browse the source-code at:
\n\nReleases are available at:
\n\n$ make\n# make install\nsusmb \\\n\t-u hiltjo \\\n\t-f \\\n\t-o 'uid=1000,gid=1000,allow_other' \\\n\t"smb://domain\\someuser@192.168.1.1/Storage" \\\n\t/mnt/share\nsusmb has the patches applied from OpenBSD ports 7.6:\nhttps://cvsweb.openbsd.org/ports/sysutils/usmb/patches
\nBelow is a summary of the most important changes:
\nAn OpenBSD port was added to sysutils/susmb (thanks to Pascal Stumpf!).
\nMailinglist thread: https://marc.info/?l=openbsd-ports&m=177169411929407&w=2
html https://www.codemadness.org/susmb.html Hiltjo 1706832000 Chess puzzle book generator https://www.codemadness.org/chess-puzzles.htmlLast modification on
\n\tThis was a christmas hack for fun and non-profit.\nI wanted to write a chess puzzle book generator.\nInspired by 1001 Deadly Checkmates by John Nunn, ISBN-13: 978-1906454258,\nSteps Method workbooks and other puzzle books.
\nTerminal version:
\ncurl -s 'https://codemadness.org/downloads/puzzles/index.vt' | less -R\nI may or may not periodially update this page :)
\nTime flies (since Christmas), here is a valentine edition with attraction\npuzzles (not only checkmates) using the red "love" theme.\nIt is optimized for his and her pleasure:
\nhttps://codemadness.org/downloads/puzzles-valentine/
\ngit clone git://git.codemadness.org/chess-puzzles\nYou can browse the source-code at:
\n\nThe generate.sh shellscript generates the output and files for the puzzles.
\nThe puzzles used are from the lichess.org puzzle database:\nhttps://database.lichess.org/#puzzles
\nThis database is a big CSV file containing the initial board state in the\nForsyth-Edwards Notation (FEN) format and the moves in Universal Chess\nInterface (UCI) format. Each line contains the board state and the initial and\nsolution moves.
\nThe generated index page is a HTML page, it lists the puzzles. Each puzzle on\nthis page is an SVG image. This scalable image format looks good in all\nresolutions.
\nLichess is an open-source and gratis website to play on-line chess. There are\nno paid levels to unlock features. All the software hosting Lichess is\nopen-source and anyone can register and play chess on it for free. Most of the\ndata about the games played is also open.
\nHowever, the website depends on your donations or contributions. If you can,\nplease do so.
\nReads puzzles from the database and shuffle them. Do some rough sorting and\ncategorization based on difficulty and assign score points.
\nThe random shuffling is done using a hard-coded random seed. This means on the\nsame machine with the same puzzle database it will regenerate the same sequence\nof random puzzles in a deterministic manner.
\nIt outputs HTML, with support for CSS dark mode and does not require Javascript.\nIt includes a plain-text listing of the solutions in PGN notation for the\npuzzles.\nIt also outputs .vt files suitable for the terminal. It uses unicode symbols\nfor the chess pieces and RGB color sequence for the board theme
\nThis is a program written in C to read and parse the board state in FEN format\nand read the UCI moves. It can output to various formats.
\nSee the man page for detailed usage information.
\nfen.c supports the following output formats:
\nfen.c can also run in CGI mode. This can be used on a HTTP server:
\nTerminal output:
\ncurl -s 'https://codemadness.org/onlyfens?moves=e2e4%20e7e5&output=tty'\nFor pgn and "speak mode" it has an option to output Dutch notated PGN or speech\ntoo.
\nFor example:
\nThere is an included example script that can stream Lichess games to the\nterminal. It uses the Lichess API. It will display the board using terminal\nescape codes. The games are automatically annotated with PGN notation and with\ntext how a human would say the notation. This can also be piped to a speech\nsynthesizer like espeak as audio.
\npgn-extract is a useful tool to convert Portable Game Notation (PGN) to\nUniversal Chess Interface (UCI) moves (or do many other useful chess related\nthings!).
\nTheres also an example script included that can generate an animated gif from\nPGN using ffmpeg.
\nIt creates an optimal color palette from the input images and generates an\noptimized animated gif. The last move (typically some checkmate) is displayed\nslightly longer.
\nchess-puzzles source-code:
\nhttps://www.codemadness.org/git/chess-puzzles/file/README.html
Lichess FEN puzzle database:
\nhttps://database.lichess.org/#puzzles
lichess.org:
\nhttps://lichess.org/
SVG of the individual pieces used in fen.c:
\nhttps://github.com/lichess-org/lila/tree/master/public/piece/cburnett
pgn-extract:
\nA great multi-purpose PGN manipulation program with many options:
\nhttps://www.cs.kent.ac.uk/people/staff/djb/pgn-extract/
An example to convert PGN games to UCI moves:
\npgn-extract --notags -Wuc
Lichess API:
\nhttps://lichess.org/api
Stockfish:
\nStrong open-source chess engine and analysis tool:
\nhttps://stockfishchess.org/
Last modification on
\n\tThis describes a simple shellscript programming pattern to process a list of\njobs in parallel. This script example is contained in one file.
\n#!/bin/sh\nmaxjobs=4\n\n# fake program for example purposes.\nsomeprogram() {\n\techo "Yep yep, I'm totally a real program!"\n\tsleep "$1"\n}\n\n# run(arg1, arg2)\nrun() {\n\techo "[$1] $2 started" >&2\n\tsomeprogram "$1" >/dev/null\n\tstatus="$?"\n\techo "[$1] $2 done" >&2\n\treturn "$status"\n}\n\n# process the jobs.\nj=1\nfor f in 1 2 3 4 5 6 7 8 9 10; do\n\trun "$f" "something" &\n\n\tjm=$((j % maxjobs)) # shell arithmetic: modulo\n\ttest "$jm" = "0" && wait\n\tj=$((j+1))\ndone\nwait\nThis is less optimal because it waits until all jobs in the same batch are finished\n(each batch contain $maxjobs items).
\nFor example with 2 items per batch and 4 total jobs it could be:
\nThis could be optimized to:
\nIt also does not handle signals such as SIGINT (^C). However the xargs example\nbelow does:
\n#!/bin/sh\nmaxjobs=4\n\n# fake program for example purposes.\nsomeprogram() {\n\techo "Yep yep, I'm totally a real program!"\n\tsleep "$1"\n}\n\n# run(arg1, arg2)\nrun() {\n\techo "[$1] $2 started" >&2\n\tsomeprogram "$1" >/dev/null\n\tstatus="$?"\n\techo "[$1] $2 done" >&2\n\treturn "$status"\n}\n\n# child process job.\nif test "$CHILD_MODE" = "1"; then\n\trun "$1" "$2"\n\texit "$?"\nfi\n\n# generate a list of jobs for processing.\nlist() {\n\tfor f in 1 2 3 4 5 6 7 8 9 10; do\n\t\tprintf '%s\\0%s\\0' "$f" "something"\n\tdone\n}\n\n# process jobs in parallel.\nlist | CHILD_MODE="1" xargs -r -0 -P "${maxjobs}" -L 2 "$(readlink -f "$0")"\nAlthough the above example is kindof stupid, it already shows the queueing of\njobs is more efficient.
\nScript 1:
\ntime ./script1.sh\n[...snip snip...]\nreal 0m22.095s\nScript 2:
\ntime ./script2.sh\n[...snip snip...]\nreal 0m18.120s\nThe parent process:
\nThe child process:
\nThe command-line arguments are passed by the parent using xargs.
\nThe environment variable $CHILD_MODE is set to indicate to the script itself\nit is run as a child process of the script.
\nThe script itself (ran in child-mode process) only executes the task and\nsignals its status back to xargs and the parent.
\nThe exit status of the child program is signaled to xargs. This could be\nhandled, for example to stop on the first failure (in this example it is not).\nFor example if the program is killed, stopped or the exit status is 255 then\nxargs stops running also.
\nFrom the OpenBSD man page: https://man.openbsd.org/xargs
\nxargs - construct argument list(s) and execute utility\nOptions explained:
\nSome of the options, like -P are as of writing (2023) non-POSIX:\nhttps://pubs.opengroup.org/onlinepubs/9699919799/utilities/xargs.html.\nHowever many systems support this useful extension for many years now.
\nThe specification even mentions implementations which support parallel\noperations:
\n"The version of xargs required by this volume of POSIX.1-2017 is required to\nwait for the completion of the invoked command before invoking another command.\nThis was done because historical scripts using xargs assumed sequential\nexecution. Implementations wanting to provide parallel operation of the invoked\nutilities are encouraged to add an option enabling parallel invocation, but\nshould still wait for termination of all of the children before xargs\nterminates normally."
\nSome historic context:
\nThe xargs -0 option was added on 1996-06-11 by Theo de Raadt, about a year\nafter the NetBSD import (over 27 years ago at the time of writing):
\n\nOn OpenBSD the xargs -P option was added on 2003-12-06 by syncing the FreeBSD\ncode:
\n\nLooking at the imported git history log of GNU findutils (which has xargs), the\nvery first commit already had the -0 and -P option:
\n\ncommit c030b5ee33bbec3c93cddc3ca9ebec14c24dbe07\nAuthor: Kevin Dalley <kevin@seti.org>\nDate: Sun Feb 4 20:35:16 1996 +0000\n\n Initial revision\nDepending on what you want to do a workaround could be to use the -0 option\nwith a single field and use the -n flag. Then in each child program invocation\nsplit the field by a separator.
\nLast modification on
\n\t... improved at least for my preferences ;)
\nIt scrapes the channel data from Youtube and combines it with the parsed Atom\nfeed from the channel on Youtube.
\nThe Atom parser is based on sfeed, with some of the code removed because it is\nnot needed by this program. It scrapes the metadata of the videos from the\nchannel its HTML page and uses my custom JSON parser to convert the\nJavascript/JSON structure.
\nThis parser is also used by the json2tsv tool. It has few dependencies.
\nThere is an option to run directly from the command-line or in CGI-mode. When\nthe environment variable $REQUEST_URI is set then it is automatically run in\nCGI mode.
\nCommand-line usage:
\nyoutube_feed channelid atom\nyoutube_feed channelid gph\nyoutube_feed channelid html\nyoutube_feed channelid json\nyoutube_feed channelid tsv\nyoutube_feed channelid txt\nCGI program usage:
\nThe last basename part of the URL should be the channelid + the output format\nextension. It defaults to TSV if there is no extension.\nThe CGI program can be used with a HTTPd or a Gopher daemon such as geomyidae.
\nFor example:
\nAtom XML: https://codemadness.org/yt-chan/UCrbvoMC0zUvPL8vjswhLOSw.xml\nHTML: https://codemadness.org/yt-chan/UCrbvoMC0zUvPL8vjswhLOSw.html\nJSON: https://codemadness.org/yt-chan/UCrbvoMC0zUvPL8vjswhLOSw.json\nTSV: https://codemadness.org/yt-chan/UCrbvoMC0zUvPL8vjswhLOSw.tsv\ntwtxt: https://codemadness.org/yt-chan/UCrbvoMC0zUvPL8vjswhLOSw.txt\nTSV, default: https://codemadness.org/yt-chan/UCrbvoMC0zUvPL8vjswhLOSw\n\nGopher dir: gopher://codemadness.org/1/feed.cgi/UCrbvoMC0zUvPL8vjswhLOSw.gph\nGopher TSV: gopher://codemadness.org/0/feed.cgi/UCrbvoMC0zUvPL8vjswhLOSw\nAn OpenBSD httpd.conf using slowcgi as an example:
\nserver "codemadness.org" {\n\tlocation "/yt-chan/*" {\n\t\trequest strip 1\n\t\troot "/cgi-bin/yt-chan"\n\t\tfastcgi socket "/run/slowcgi.sock"\n\t}\n}\nsfeedrc example of an existing Youtube RSS/Atom feed:
\n# list of feeds to fetch:\nfeeds() {\n\t# feed <name> <feedurl> [basesiteurl] [encoding]\n\t# normal Youtube Atom feed.\n\tfeed "yt IM" "https://www.youtube.com/feeds/videos.xml?channel_id=UCrbvoMC0zUvPL8vjswhLOSw"\n}\nUse the new Atom feed directly using the CGI-mode and Atom output format:
\n# list of feeds to fetch:\nfeeds() {\n\t# feed <name> <feedurl> [basesiteurl] [encoding]\n\t# new Youtube Atom feed.\n\tfeed "idiotbox IM" "https://codemadness.org/yt-chan/UCrbvoMC0zUvPL8vjswhLOSw.xml"\n}\n... or convert directly using a custom connector program on the local system via the command-line:
\n# fetch(name, url, feedfile)\nfetch() {\n\tcase "$1" in\n\t"connector example")\n\t\tyoutube_feed "$2";;\n\t*)\n\t\tcurl -L --max-redirs 0 -H "User-Agent:" -f -s -m 15 \\\n\t\t\t"$2" 2>/dev/null;;\n\tesac\n}\n\n# parse and convert input, by default XML to the sfeed(5) TSV format.\n# parse(name, feedurl, basesiteurl)\nparse() {\n\tcase "$1" in\n\t"connector example")\n\t\tcat;;\n\t*)\n\t\tsfeed "$3";;\n\tesac\n}\n\n# list of feeds to fetch:\nfeeds() {\n\t# feed <name> <feedurl> [basesiteurl] [encoding]\n\tfeed "connector example" "UCrbvoMC0zUvPL8vjswhLOSw"\n}\n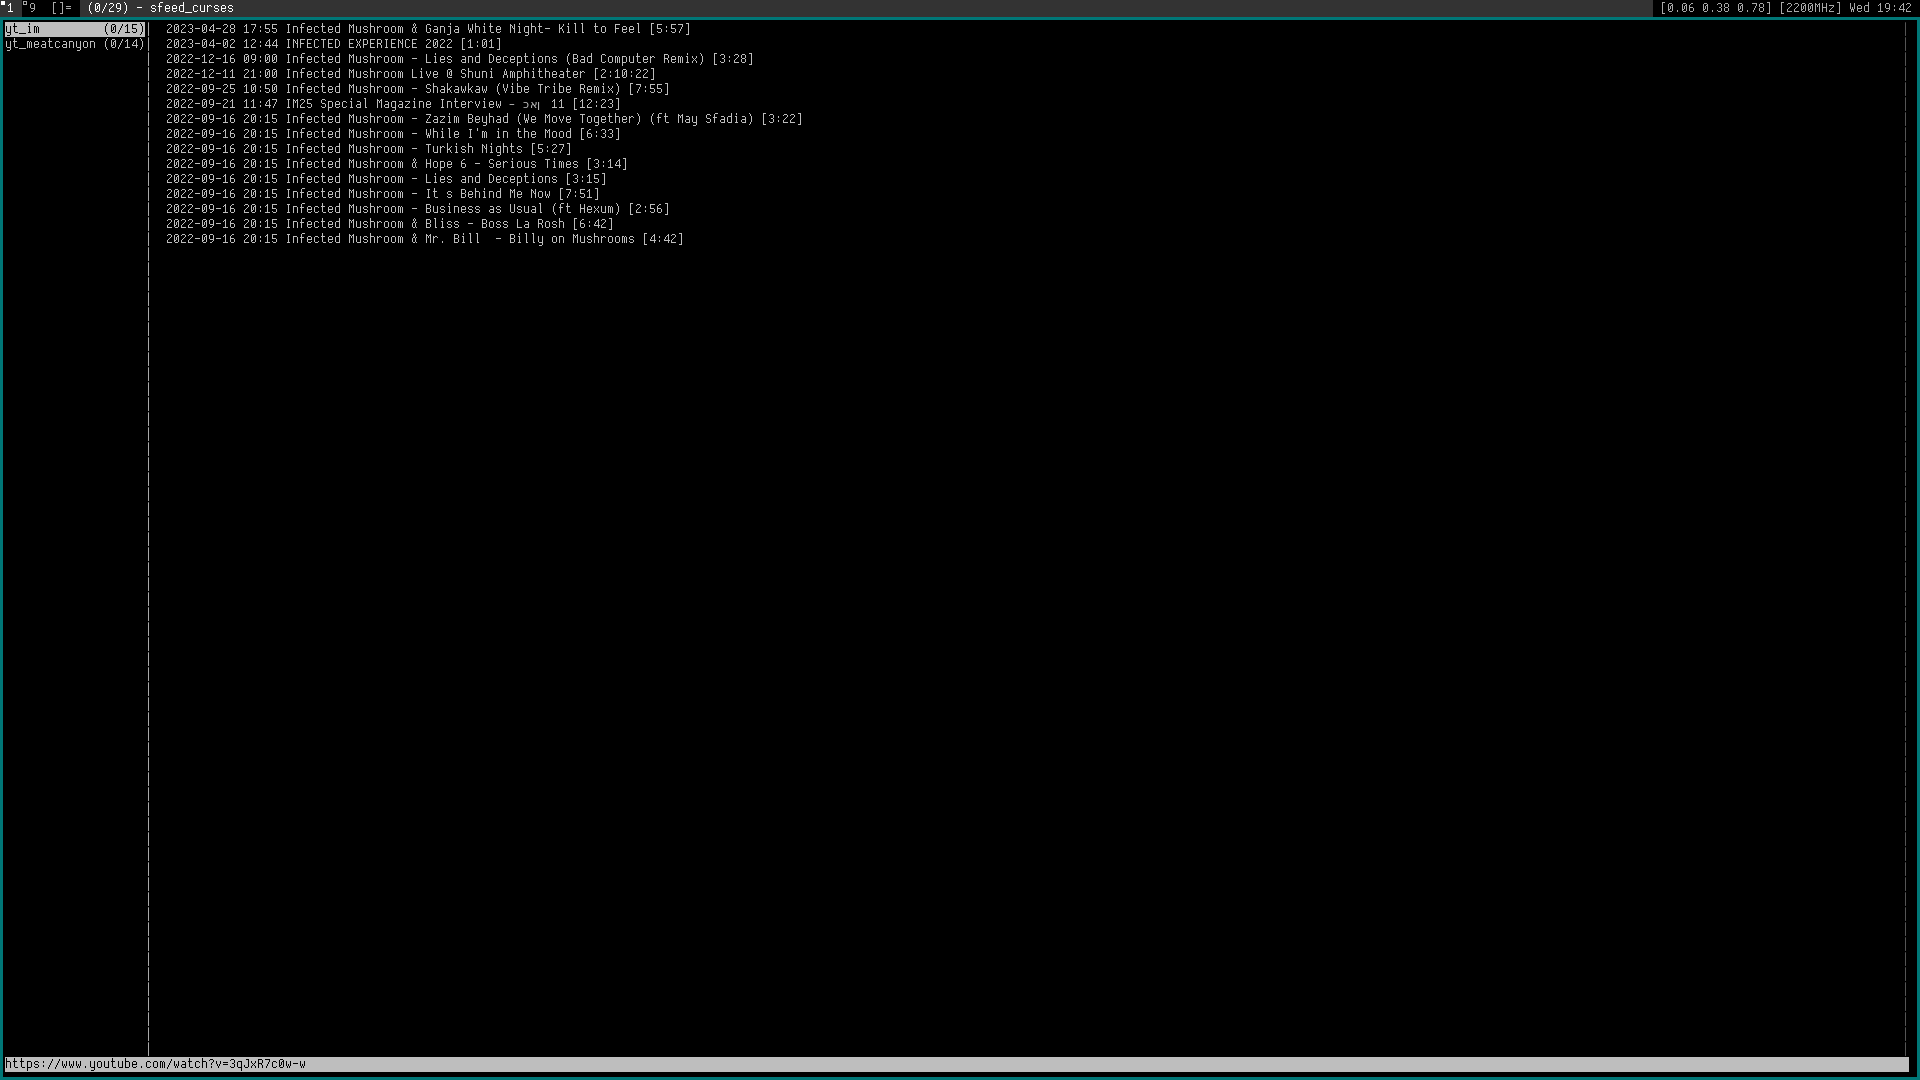
git clone git://git.codemadness.org/frontends\nYou can browse the source-code at:
\nThe program is: youtube/feed
\n$ make\n# make install\nI hope by sharing this it is useful to someone other than me as well.
html https://www.codemadness.org/youtube-feed.html Hiltjo 1700438400 webdump HTML to plain-text converter https://www.codemadness.org/webdump.htmlLast modification on
\n\twebdump is (yet another) HTML to plain-text converter tool.
\nIt reads HTML in UTF-8 from stdin and writes plain-text to stdout.
\nThe main goal of this tool for me is to use it for converting HTML mails to\nplain-text and to convert HTML content in RSS feeds to plain-text.
\nThe tool will only convert HTML to stdout, similarly to links -dump or lynx\n-dump but simpler and more secure.
\nurl='https://codemadness.org/sfeed.html'\n\ncurl -s "$url" | webdump -r -b "$url" | less\n\ncurl -s "$url" | webdump -8 -a -i -l -r -b "$url" | less -R\n\ncurl -s "$url" | webdump -s 'main' -8 -a -i -l -r -b "$url" | less -R\nYes, all these option flags look ugly, a shellscript wrapper could be used :)
\nTo use webdump as a HTML to text filter for example in the mutt mail client,\nchange in ~/.mailcap:
\ntext/html; webdump -i -l -r < %s; needsterminal; copiousoutput\nIn mutt you should then add:
\nauto_view text/html\nUsing webdump as a HTML to text filter for sfeed_curses (otherwise the default is lynx):
\nSFEED_HTMLCONV="webdump -d -8 -r -i -l -a" sfeed_curses ~/.sfeed/feeds/*\nThe query syntax using the -s option is a bit inspired by CSS (but much more limited).
\nTo get the title from a HTML page:
\nurl='https://codemadness.org/sfeed.html'\n\ntitle=$(curl -s "$url" | webdump -s 'title')\nprintf '%s\\n' "$title"\nList audio and video-related content from a HTML page, redirect fd 3 to fd 1 (stdout):
\nurl="https://media.ccc.de/v/051_Recent_features_to_OpenBSD-ntpd_and_bgpd"\ncurl -s "$url" | webdump -x -s 'audio,video' -b "$url" 3>&1 >/dev/null | cut -f 2\ngit clone git://git.codemadness.org/webdump\nYou can browse the source-code at:
\n\nReleases are available at:
\n\n$ make\n# make install\nAll software has trade-offs.
\nwebdump processes HTML in a single-pass. It does not buffer the full DOM tree.\nAlthough due to the nature of HTML/XML some parts like attributes need to be\nbuffered.
\nRendering tables in webdump is very limited. Twibright Links has really nice\ntable rendering. However implementing a similar feature in the current design of\nwebdump would make the code much more complex. Twibright links\nprocesses a full DOM tree and processes the tables in multiple passes (to\nmeasure the table cells) etc. Of course tables can be nested also, or HTML tables\nthat are used for creating layouts (these are mostly older webpages).
\nThese trade-offs and preferences are chosen for now. It may change in the\nfuture. Fortunately there are the usual good suspects for HTML to plain-text\nconversion, each with their own chosen trade-offs of course:
\nLast modification on
\n\tThis script is tested on OpenBSD using OpenBSD smtpd and OpenBSD httpd and the\ngopher daemon geomyidae.
\nOn OpenBSD:
\npkg_add mblaze\nIn your mail aliases (for example /etc/mail/aliases) put:
\npaste: |/usr/local/bin/paste-mail\nThis pipes the mail to the script paste-mail for processing, this script is\ndescribed below. Copy the below contents in /usr/local/bin/paste-mail
\nScript:
\n#!/bin/sh\n\nd="/home/www/domains/www.codemadness.org/htdocs/mailpaste"\ntmpmsg=$(mktemp)\ntmpmail=$(mktemp)\n\ncleanup() {\n\trm -f "$tmpmail" "$tmpmsg"\n}\n\n# store whole mail from stdin temporarily, on exit remove temporary file.\ntrap "cleanup" EXIT\ncat > "$tmpmail"\n\n# mblaze: don't store mail sequence.\nMAILSEQ=/dev/null\nexport MAILSEQ\n\n# get from address (without display name).\nfrom=$(maddr -a -h 'From' /dev/stdin < "$tmpmail")\n\n# check if allowed or not.\ncase "$from" in\n"hiltjo@codemadness.org")\n\t;;\n*)\n\texit 0;;\nesac\n\n# prevent mail loop.\nif printf '%s' "$from" | grep -q "paste@"; then\n\texit 0\nfi\n\necho "Thank you for using the enterprise paste service." > "$tmpmsg"\necho "" >> "$tmpmsg"\necho "Your file(s) are available at:" >> "$tmpmsg"\necho "" >> "$tmpmsg"\n\n# process each attachment.\nmshow -n -q -t /dev/stdin < "$tmpmail" | sed -nE 's@.*name="(.*)".*@\\1@p' | while read -r name; do\n\ttest "$name" = "" && continue\n\n\t# extract attachment.\n\ttmpfile=$(mktemp -p "$d" XXXXXXXXXXXX)\n\tmshow -n -O /dev/stdin "$name" < "$tmpmail" > "$tmpfile"\n\n\t# use file extension.\n\text="${name##*/}"\n\tcase "$ext" in\n\t*.tar.*)\n\t\t# special case: support .tar.gz, tar.bz2, etc.\n\t\text="tar.${ext##*.}";;\n\t*.*)\n\t\text="${ext##*.}";;\n\t*)\n\t\text="";;\n\tesac\n\text="${ext%%*.}"\n\n\t# use file extension if it is set.\n\toutputfile="$tmpfile"\n\tif test "$ext" != ""; then\n\t\toutputfile="$tmpfile.$ext"\n\tfi\n\tmv "$tmpfile" "$outputfile"\n\tb=$(basename "$outputfile")\n\n\tchmod 666 "$outputfile"\n\turl="gopher://codemadness.org/9/mailpaste/$b"\n\n\techo "$name:" >> "$tmpmsg"\n\techo "\tText file: gopher://codemadness.org/0/mailpaste/$b" >> "$tmpmsg"\n\techo "\tImage file: gopher://codemadness.org/I/mailpaste/$b" >> "$tmpmsg"\n\techo "\tBinary file: gopher://codemadness.org/9/mailpaste/$b" >> "$tmpmsg"\n\techo "" >> "$tmpmsg"\ndone\n\necho "" >> "$tmpmsg"\necho "Sincerely," >> "$tmpmsg"\necho "Your friendly paste_bot" >> "$tmpmsg"\n\n# mail back the user.\nmail -r "$from" -s "Your files" "$from" < "$tmpmsg"\n\ncleanup\nThe mail daemon processing the mail needs of course to be able to have\npermissions to write to the specified directory. The user who received the mail\nneeds to be able to read it from a location they can access and have\npermissions for it also.
\nThis is just an example script. There is room for many improvements.\nFeel free to change it in any way you like.
\nI hope this enterprise(tm) mail service is inspirational or something ;)
html https://www.codemadness.org/mailservice.html Hiltjo 1656633600 A simple TODO application https://www.codemadness.org/todo-application.htmlLast modification on
\n\tThis article describes a TODO application or workflow.
\nIt works like this:
\nThe text format I use is this:
\n[indendations]<symbol><SPACE><item text><NEWLINE>\nMost of the time an item is just one line.\nThis format is just a general guideline to keep the items somewhat structured.
\nItems are prefixed with a symbol.
\nI use an indendation with a TAB before an item to indicate item dependencies.\nThe items can be nested.
\nFor the prioritization I put the most important items and sections from the top\nto the bottom. These can be reshuffled as you wish of course.
\nTo delete an item you remove the line. To archive an item you keep the line.
\nA section is a line which has no symbol. This is like a header to group items.
\nChecklist for releasing project 0.1:\n- Test project with different compilers and check for warnings.\n- Documentation:\n\t- Proofread and make sure it matches all program behaviour.\n\t- Run mandoc -Tlint on the man pages.\n\t? Copy useful examples from the README file to the man page?\n- Run testsuite and check for failures before release.\n\n\nproject 0.2:\n? Investigate if feature mentioned by some user is worth adding.\nssh -t host 'ed TODO'\nssh host\ntmux or tmux a\ned TODO\nssh host\ntmux or tmux a\ned TODO\ngit add TODO\ngit commit -m 'TODO: update'\nI hope this is inspirational or something,
html https://www.codemadness.org/todo-application.html Hiltjo 1647993600 2FA TOTP without crappy authenticator apps https://www.codemadness.org/totp.htmlLast modification on
\n\tThis describes how to use 2FA without using crappy authenticator "apps" or a\nmobile device.
\nOn OpenBSD:
\npkg_add oath-toolkit zbar\nOn Void Linux:
\nxbps-install oath-toolkit zbar\nThere is probably a package for your operating system.
\nSave the QR code image from the authenticator app, website to an image file.\nScan the QR code text from the image:
\nzbarimg image.png\nAn example QR code:
\n
The output is typically something like:
\nQR-Code:otpauth://totp/Example:someuser@codemadness.org?secret=SECRETKEY&issuer=Codemadness\nYou only need to scan this QR-code for the secret key once.\nMake sure to store the secret key in a private safe place and don't show it to\nanyone else.
\nUsing the secret key the following command outputs a 6-digit code by default.\nIn this example we also assume the key is base32-encoded.\nThere can be other parameters and options, this is documented in the Yubico URI\nstring format reference below.
\nCommand:
\noathtool --totp -b SOMEKEY\nTip: you can create a script that automatically puts the digits in the\nclipboard, for example:
\noathtool --totp -b SOMEKEY | xclip\nLast modification on
\n\tThis describes how to setup an OpenBSD RISCV64 VM in QEMU.
\nThe shellscript below does the following:
\nThe script is tested on the host GNU/Void Linux and OpenBSD-current.
\nIMPORTANT!: The signature and checksum for the miniroot, u-boot and opensbi\nfiles are not verified. If the host is OpenBSD make sure to instead install the\npackages (pkg_add u-boot-riscv64 opensbi) and adjust the firmware path for the\nqemu -bios and -kernel options.
\n#!/bin/sh\n# mirror list: https://www.openbsd.org/ftp.html\nmirror="https://ftp.bit.nl/pub/OpenBSD/"\nrelease="7.0"\nminirootname="miniroot70.img"\n\nminiroot() {\n\ttest -f "${minirootname}" && return # download once\n\n\turl="${mirror}/${release}/riscv64/${minirootname}"\n\tcurl -o "${minirootname}" "${url}"\n}\n\ncreaterootdisk() {\n\ttest -f disk.raw && return # create once\n\tqemu-img create disk.raw 10G # create 10 GB disk\n\tdd conv=notrunc if=${minirootname} of=disk.raw # write miniroot to disk\n}\n\nopensbi() {\n\tf="opensbi.tgz"\n\ttest -f "${f}" && return # download and extract once.\n\n\turl="${mirror}/${release}/packages/amd64/opensbi-0.9p0.tgz"\n\tcurl -o "${f}" "${url}"\n\n\ttar -xzf "${f}" share/opensbi/generic/fw_jump.bin\n}\n\nuboot() {\n\tf="uboot.tgz"\n\ttest -f "${f}" && return # download and extract once.\n\n\turl="${mirror}/${release}/packages/amd64/u-boot-riscv64-2021.07p0.tgz"\n\tcurl -o "${f}" "${url}"\n\n\ttar -xzf "${f}" share/u-boot/qemu-riscv64_smode/u-boot.bin\n}\n\nsetup() {\n\tminiroot\n\tcreaterootdisk\n\topensbi\n\tuboot\n}\n\nrun() {\n\tqemu-system-riscv64 \\\n\t\t-machine virt \\\n\t\t-nographic \\\n\t\t-m 2048M \\\n\t\t-smp 2 \\\n\t\t-bios share/opensbi/generic/fw_jump.bin \\\n\t\t-kernel share/u-boot/qemu-riscv64_smode/u-boot.bin \\\n\t\t-drive file=disk.raw,format=raw,id=hd0 -device virtio-blk-device,drive=hd0 \\\n\t\t-netdev user,id=net0,ipv6=off -device virtio-net-device,netdev=net0\n}\n\nsetup\nrun\nLast modification on
\n\tsfeed_curses is a curses UI front-end for sfeed.\nIt is now part of sfeed.
\nIt shows the TAB-separated feed items in a graphical command-line UI. The\ninterface has a look inspired by the mutt mail client. It has a sidebar\npanel for the feeds, a panel with a listing of the items and a small statusbar\nfor the selected item/URL. Some functions like searching and scrolling are\nintegrated in the interface itself.
\nLike the format programs included in sfeed you can run it by giving the feed\nfiles as arguments like this:
\nsfeed_curses ~/.sfeed/feeds/*\n... or by reading directly from stdin:
\nsfeed_curses < ~/.sfeed/feeds/xkcd\nIt will show a sidebar if one or more files are specified as parameters. It\nwill not show the sidebar by default when reading from stdin.
\n
On pressing the 'o' or ENTER keybind it will open the link URL of an item with\nthe plumb program. On pressing the 'a', 'e' or '@' keybind it will open the\nenclosure URL if there is one. The default plumb program is set to xdg-open,\nbut can be modified by setting the environment variable $SFEED_PLUMBER. The\nplumb program receives the URL as a command-line argument.
\nThe TAB-Separated-Value line of the current selected item in the feed file can\nbe piped to a program by pressing the 'c', 'p' or '|' keybind. This allows much\nflexibility to make a content formatter or write other custom actions or views.\nThis line is in the exact same format as described in the sfeed(5) man page.
\nThe pipe program can be changed by setting the environment variable\n$SFEED_PIPER.
\n
The above screenshot shows the included sfeed_content shellscript which uses\nthe lynx text-browser to convert HTML to plain-text. It pipes the formatted\nplain-text to the user $PAGER (or "less").
\nOf course the script can be easily changed to use a different browser or\nHTML-to-text converter like:
\n\nIt's easy to modify the color-theme by changing the macros in the source-code\nor set a predefined theme at compile-time. The README file contains information\nhow to set a theme. On the left a TempleOS-like color-theme on the right a\nnewsboat-like colorscheme.
\n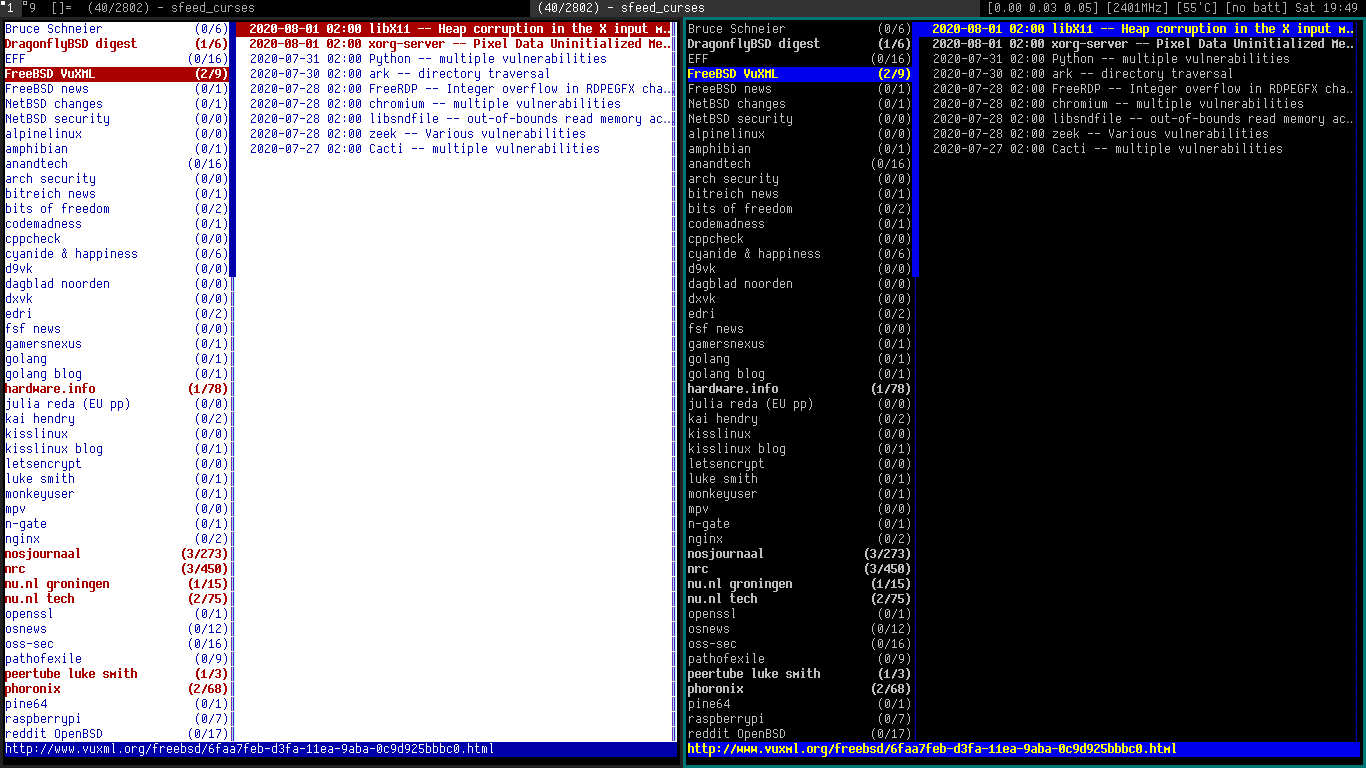
It supports a vertical layout, horizontal and monocle (full-screen) layout.\nThis can be useful for different kind of screen sizes. The keybinds '1', '2'\nand '3' can be used to switch between these layouts.
\n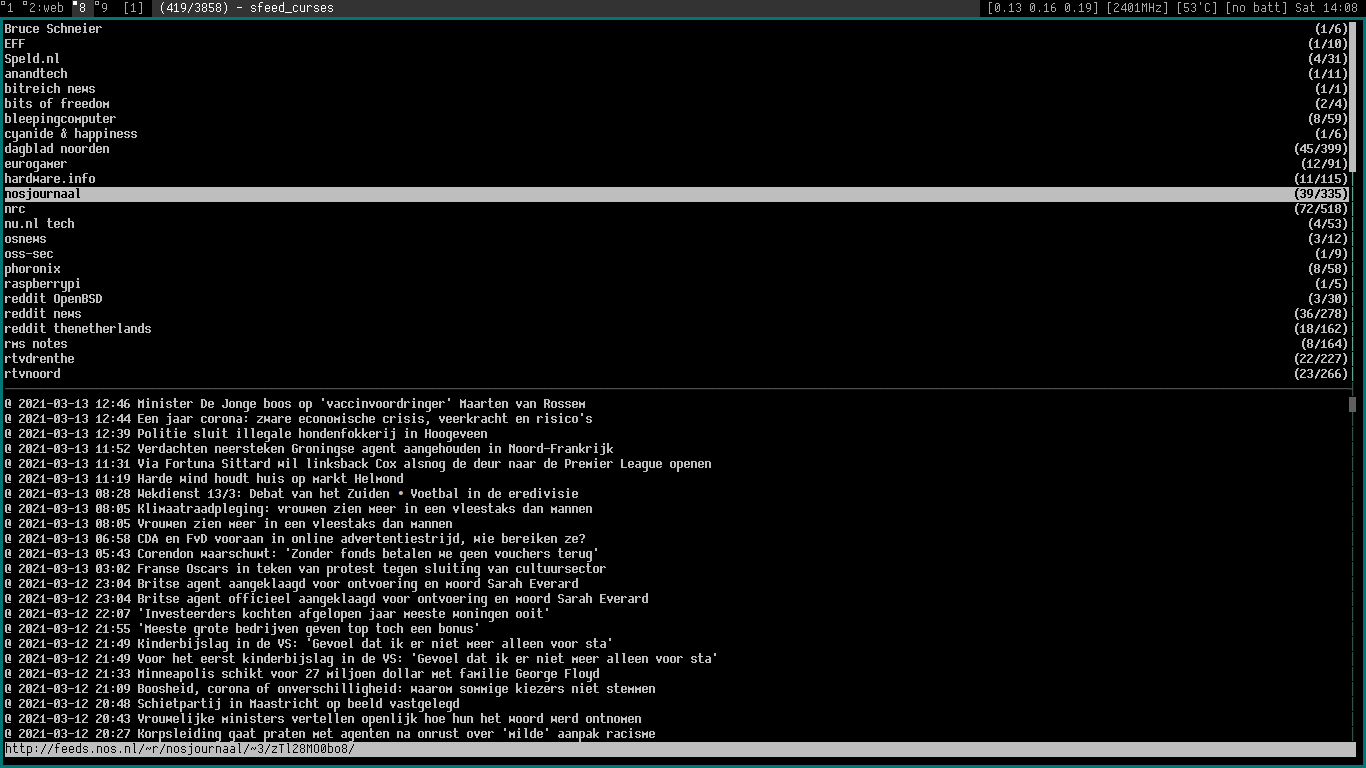
git clone git://git.codemadness.org/sfeed\nYou can browse the source-code at:
\n\nReleases are available at:
\n\n$ make\n# make install\nLast modification on
\n\thurl is a relatively simple HTTP, HTTPS and Gopher client/file grabber.
\nSometimes (or most of the time?) you just want to fetch a file via the HTTP,\nHTTPS or Gopher protocol.
\nThe focus of this tool is only this.
\ngit clone git://git.codemadness.org/hurl\nYou can browse the source-code at:
\n\nReleases are available at:
\n\n$ make\n# make install\nFetch the Atom feed from this site using a maximum filesize limit of 1MB and\na time-out limit of 15 seconds:
\nhurl -m 1048576 -t 15 "https://codemadness.org/atom.xml"\nThere is an -H option to add custom headers. This way some of the anti-features\nlisted above are supported. For example some CDNs like Cloudflare are known to\nblock empty or certain User-Agents.
\nUser-Agent:
\nhurl -H 'User-Agent: some browser' 'https://codemadness.org/atom.xml'\nHTTP Basic Auth (base64-encoded username:password):
\nhurl -H 'Authorization: Basic dXNlcm5hbWU6cGFzc3dvcmQ=' \\\n\t'https://codemadness.org/atom.xml'\nGZIP (this assumes the served response Content-Type is gzip):
\nhurl -H 'Accept-Encoding: gzip' 'https://somesite/' | gzip -d\nLast modification on
\n\tConvert JSON to TSV or separated output.
\njson2tsv reads JSON data from stdin. It outputs each JSON type to a TAB-\nSeparated Value format per line by default.
\nThe output format per line is:
\nnodename<TAB>type<TAB>value<LF>\nControl-characters such as a newline, TAB and backslash (\\n, \\t and \\) are\nescaped in the nodename and value fields. Other control-characters are\nremoved.
\nThe type field is a single byte and can be:
\nFiltering on the first field "nodename" is easy using awk for example.
\nI wanted a tool that makes parsing JSON easier and work well from the shell,\nsimilar to jq.
\nsed and grep often work well enough for matching some value using some regex\npattern, but it is not good enough to parse JSON correctly or to extract all\ninformation: just like parsing HTML/XML using some regex is not good (enough)\nor a good idea :P.
\nI didn't want to learn a new specific meta-language which jq has and wanted\nsomething simpler.
\nWhile it is more efficient to embed this query language for data aggregation,\nit is also less simple. In my opinion it is simpler to separate this and use\npattern-processing by awk or an other filtering/aggregating program.
\nFor the parser, there are many JSON parsers out there, like the efficient\njsmn parser, however a few parser behaviours I want to have are:
\nThis is why I went for a parser design that uses a single callback per "node"\ntype and keeps track of the current nested structure in a single array and\nemits that.
\ngit clone git://git.codemadness.org/json2tsv\nYou can browse the source-code at:
\n\nReleases are available at:
\n\n$ make\n# make install\nAn usage example to parse posts of the JSON API of reddit.com and format them\nto a plain-text list using awk:
\n#!/bin/sh\ncurl -s -H 'User-Agent:' 'https://old.reddit.com/.json?raw_json=1&limit=100' | \\\njson2tsv | \\\nawk -F '\\t' '\nfunction show() {\n\tif (length(o["title"]) == 0)\n\t\treturn;\n\tprint n ". " o["title"] " by " o["author"] " in r/" o["subreddit"];\n\tprint o["url"];\n\tprint "";\n}\n$1 == ".data.children[].data" {\n\tshow();\n\tn++;\n\tdelete o;\n}\n$1 ~ /^\\.data\\.children\\[\\]\\.data\\.[a-zA-Z0-9_]*$/ {\n\to[substr($1, 23)] = $3;\n}\nEND {\n\tshow();\n}'\nLast modification on
\n\tThis guide describes how to setup a local mirror and installation/upgrade\nserver that requires little or no input interaction.
\nThe HTTP mirror will be used to fetch the base sets and (optional) custom sets.\nIn this guide we will assume 192.168.0.2 is the local installation server\nand mirror, the CPU architecture is amd64 and the OpenBSD release version is\n6.5. We will store the files in the directory with the structure:
\nhttp://192.168.0.2/pub/OpenBSD/6.5/amd64/\nCreate the www serve directory and fetch all sets and install files\n(if needed to save space *.iso and install65.fs can be skipped):
\n$ cd /var/www/htdocs\n$ mkdir -p pub/OpenBSD/6.5/amd64/\n$ cd pub/OpenBSD/6.5/amd64/\n$ ftp 'ftp://ftp.nluug.nl/pub/OpenBSD/6.5/amd64/*'\nVerify signature and check some checksums:
\n$ signify -C -p /etc/signify/openbsd-65-base.pub -x SHA256.sig\nSetup httpd(8) for simple file serving:
\n# $FAVORITE_EDITOR /etc/httpd.conf\nA minimal example config for httpd.conf(5):
\nserver "*" {\n\tlisten on * port 80\n}\nThe default www root directory is: /var/www/htdocs/
\nEnable the httpd daemon to start by default and start it now:
\n# rcctl enable httpd\n# rcctl start httpd\nThe installer supports loading responses to the installation/upgrade questions\nfrom a simple text file. We can do a regular installation and copy the answers\nfrom the saved file to make an automated version of it.
\nDo a test installation, at the end of the installation or upgrade when asked the\nquestion:
\nExit to (S)hell, (H)alt or (R)eboot?\nType S to go to the shell. Find the response file for an installation and copy\nit to some USB stick or write down the response answers:
\ncp /tmp/i/install.resp /mnt/usbstick/\nA response file could be for example:
\nSystem hostname = testvm\nWhich network interface do you wish to configure = em0\nIPv4 address for em0 = dhcp\nIPv6 address for em0 = none\nWhich network interface do you wish to configure = done\nPassword for root account = $2b$10$IqI43aXjgD55Q3nLbRakRO/UAG6SAClL9pyk0vIUpHZSAcLx8fWk.\nPassword for user testuser = $2b$10$IqI43aXjgD55Q3nLbRakRO/UAG6SAClL9pyk0vIUpHZSAcLx8fWk.\nStart sshd(8) by default = no\nDo you expect to run the X Window System = no\nSetup a user = testuser\nFull name for user testuser = testuser\nWhat timezone are you in = Europe/Amsterdam\nWhich disk is the root disk = wd0\nUse (W)hole disk MBR, whole disk (G)PT, (O)penBSD area or (E)dit = OpenBSD\nUse (A)uto layout, (E)dit auto layout, or create (C)ustom layout = a\nLocation of sets = http\nHTTP proxy URL = none\nHTTP Server = 192.168.0.2\nServer directory = pub/OpenBSD/6.5/amd64\nUnable to connect using https. Use http instead = yes\nLocation of sets = http\nSet name(s) = done\nLocation of sets = done\nExit to (S)hell, (H)alt or (R)eboot = R\nGet custom encrypted password for response file:
\n$ printf '%s' 'yourpassword' | encrypt\nrdsetroot(8) is publicly exposed now in base since 6.5. Before 6.5 it is\navailable in the /usr/src/ tree as elfrdsetroot, see also the rd(4) man page.
\n$ mkdir auto\n$ cd auto\n$ cp pubdir/bsd.rd .\n$ rdsetroot -x bsd.rd disk.fs\n# vnconfig vnd0 disk.fs\n# mkdir mount\n# mount /dev/vnd0a mount\nCopy the response file (install.resp) to: mount/auto_install.conf\n(installation) or mount/auto_upgrade.conf (upgrade), but not both. In this\nguide we will do an auto-installation.
\nUnmount, detach and patch RAMDISK:
\n# umount mount\n# vnconfig -u vnd0\n$ rdsetroot bsd.rd disk.fs\nTo test copy bsd.rd to the root of some testmachine like /bsd.test.rd then\n(re)boot and type:
\nboot /bsd.test.rd\nIn the future (6.5+) it will be possible to copy to a file named "/bsd.upgrade"\nin the root of a current system and automatically load the kernel:\nSee the script bsd.upgrade in CVS.\nOf course this is possible with PXE boot or some custom USB/ISO also.\nAs explained in the autoinstall(8) man page: create either an\nauto_upgrade.conf or an auto_install.conf, but not both.
\nIn this example the miniroot will boot the custom kernel, but fetch all the\nsets from the local network.
\nWe will base our miniroot of the official version: miniroot65.fs.
\nWe will create a 16MB miniroot to boot from (in this guide it is assumed the\noriginal miniroot is about 4MB and the modified kernel image fits in the new\nallocated space):
\n$ dd if=/dev/zero of=new.fs bs=512 count=32768\nCopy first part of the original image to the new disk (no truncation):
\n$ dd conv=notrunc if=miniroot65.fs of=new.fs\n# vnconfig vnd0 new.fs\nExpand disk OpenBSD boundaries:
\n# disklabel -E vnd0\n> b\nStarting sector: [1024]\nSize ('*' for entire disk): [8576] *\n> r\nTotal free sectors: 1168.\n> c a\nPartition a is currently 8576 sectors in size, and can have a maximum\nsize of 9744 sectors.\nsize: [8576] *\n> w\n> q\nor:
\n# printf 'b\\n\\n*\\nc a\\n*\\nw\\n' | disklabel -E vnd0\nGrow filesystem and check it and mark as clean:
\n# growfs -y /dev/vnd0a\n# fsck -y /dev/vnd0a\nMount filesystem:
\n# mount /dev/vnd0a mount/\nThe kernel on the miniroot is GZIP compressed. Compress our modified bsd.rd and\noverwrite the original kernel:
\n# gzip -c9n bsd.rd > mount/bsd\nOr to save space (+- 500KB) by stripping debug symbols, taken from bsd.gz target\nin this Makefile.
\n$ cp bsd.rd bsd.strip\n$ strip bsd.strip\n$ strip -R .comment -R .SUNW_ctf bsd.strip\n$ gzip -c9n bsd.strip > bsd.gz\n$ cp bsd.gz mount/bsd\nNow unmount and detach:
\n# umount mount/\n# vnconfig -u vnd0\nNow you can dd(1) the image new.fs to your bootable (USB) medium.
\nFor patching /etc/rc.firsttime and other system files it is useful to use a\ncustomized installation set like siteVERSION.tgz, for example: site65.tgz. The\nsets can even be specified per host/MAC address like\nsiteVERSION-$(hostname -s).tgz so for example: site65-testvm.tgz
\nWhen the installer checks the base sets of the mirror it looks for a file\nindex.txt. To add custom sets the site entries have to be added.
\nFor example:
\n-rw-r--r-- 1 1001 0 4538975 Oct 11 13:58:26 2018 site65-testvm.tgz\nThe filesize, permissions etc do not matter and are not checked by the\ninstaller. Only the filename is matched by a regular expression.
\nIf you have custom sets without creating a signed custom release you will be\nprompted for the messages:
\nchecksum test failed\nand:
\nunverified sets: continue without verification\nOpenBSD uses the program signify(1) to cryptographically sign and\nverify filesets.
\nTo create a custom public/private keypair (ofcourse make sure to store the\nprivate key privately):
\n$ signify -G -n -c "Custom 6.5 install" -p custom-65-base.pub -s custom-65-base.sec\nCreate new checksum file with filelist of the current directory (except SHA256*\nfiles):
\n$ printf '%s\\n' * | grep -v SHA256 | xargs sha256 > SHA256\nSign SHA256 and store as SHA256.sig, embed signature:
\n$ signify -S -e -s /privatedir/custom-65-base.sec -m SHA256 -x SHA256.sig\nVerify the created signature and data is correct:
\n$ signify -C -p /somelocation/custom-65-base.pub -x SHA256.sig\nCopy only the public key to the RAMDISK:
\n$ cp custom-65-base.pub mount/etc/signify/custom-65-base.pub\nNow we have to patch the install.sub file to check our public key. If you know\na better way without having to patch this script, please let me know.
\nChange the variable PUB_KEY in the shellscript mount/install.sub from:
\nPUB_KEY=/etc/signify/openbsd-${VERSION}-base.pub\nTo:
\nPUB_KEY=/etc/signify/custom-${VERSION}-base.pub\nAnd for upgrades from:
\n$UPGRADE_BSDRD &&\n\tPUB_KEY=/mnt/etc/signify/openbsd-$((VERSION + 1))-base.pub\nTo:
\n$UPGRADE_BSDRD &&\n\tPUB_KEY=/mnt/etc/signify/custom-$((VERSION + 1))-base.pub\nLast modification on
\n\tIdiotbox is a less resource-heavy Youtube interface. For viewing videos it is\nrecommended to use it with mpv or\nmplayer with\nyoutube-dl or\nyt-dlp.
\nFor more (up-to-date) information see the README file.
\nIn my opinion the standard Youtube web interface is:
\ngit clone git://git.codemadness.org/frontends\nYou can browse the source-code at:
\n\nReleases are available at:
\n\nYou can view it here: https://codemadness.org/idiotbox/
\nFor example you can search using the query string parameter "q":\nhttps://codemadness.org/idiotbox/?q=gunther+tralala
\nThe gopher version is here: gopher://codemadness.org/7/idiotbox.cgi
html https://www.codemadness.org/idiotbox.html Hiltjo 1534464000 Gopher HTTP proxy https://www.codemadness.org/gopher-proxy.htmlLast modification on
\n\tFor fun I wrote a small HTTP Gopher proxy CGI program in C. It only supports\nthe basic Gopher types and has some restrictions to prevent some abuse.
\nFor your regular Gopher browsing I recommend the simple Gopher client sacc.
\nFor more information about Gopher check out gopherproject.org.
\ngit clone git://git.codemadness.org/gopherproxy-c\nYou can browse the source-code at:
\n\nYou can view it here:\nhttps://codemadness.org/gopherproxy/
\nFor example you can also view my gopherhole using the proxy, the query string\nparameter "q" reads the URI:\nhttps://codemadness.org/gopherproxy/?q=codemadness.org
\nDue to abuse this service is (temporary) disabled, but of course you can self-host it
\nFor authors writing crawler bots: please respect robots.txt, HTTP status codes and test your code properly
html https://www.codemadness.org/gopher-proxy.html Hiltjo 1520640000 Setup your own file paste service https://www.codemadness.org/paste-service.htmlLast modification on
\n\tMake sure to setup SSH public key authentication so you don't need to enter a\npassword each time and have a more secure authentication.
\nFor example in the file $HOME/.ssh/config:
\nHost codemadness\n\tHostname codemadness.org\n\tPort 22\n\tIdentityFile ~/.ssh/codemadness/id_rsa\nOf course also make sure to generate the private and public keys.
\nMake an alias or function in your shell config:
\npastesrv() {\n\tssh user@codemadness "cat > /your/www/publicdir/paste/$1"\n\techo "https://codemadness.org/paste/$1"\n}\nThis function reads any data from stdin and transfers the output securely via\nSSH and writes it to a file at the specified path. This path can be visible via\nHTTP, gopher or an other protocol. Then it writes the absolute URL to stdout,\nthis URL can be copied to the clipboard and pasted anywhere like to an e-mail,\nIRC etc.
\nTo use it, here are some examples:
\nCreate a patch of the last commit in the git repo and store it:
\ngit format-patch --stdout HEAD^ | pastesrv 'somepatch.diff'\nCreate a screenshot of your current desktop and paste it:
\nxscreenshot | ff2png | pastesrv 'screenshot.png'\nThere are many other uses of course, use your imagination :)
html https://www.codemadness.org/paste-service.html Hiltjo 1519516800 Setup your own git hosting service https://www.codemadness.org/setup-git-hosting.htmlLast modification on
\n\tThis article assumes you use OpenBSD for the service files and OS-specific\nexamples.
\nA good reason to host your own git repositories is because of having and\nkeeping control over your own computing infrastructure.
\nSome bad examples:
\nThe same thing can happen with Github, Atlassian Bitbucket or other similar\nservices. After all: they are just a company with commercial interests. These\nonline services also have different pricing plans and various (arbitrary)\nrestrictions. When you host it yourself the restrictions are the resource\nlimits of the system and your connection, therefore it is a much more flexible\nsolution.
\nAlways make sure you own the software (which is Free or open-source) and you\ncan host it yourself, so you will be in control of it.
\nFor the hosting it is recommended to use a so-called "bare" repository. A bare\nrepository means no files are checked out in the folder itself. To create a\nbare repository use git init with the --bare argument:
\n$ git init --bare\nI recommend to create a separate user and group for the source-code\nrepositories. In the examples we will assume the user is called "src".
\nLogin as the src user and create the files. To create a directory for the\nrepos, in this example /home/src/src:
\n$ mkdir -p /home/src/src\n$ cd /home/src/src\n$ git init --bare someproject\n$ $EDITOR someproject/description\nMake sure the git-daemon process has access permissions to these repositories.
\nUsing git-daemon you can clone the repositories publicly using the efficient\ngit:// protocol. An alternative without having to use git-daemon is by using\n(anonymous) SSH, HTTPS or any public shared filesystem.
\nWhen you use a private-only repository I recommend to just use SSH without\ngit-daemon because it is secure.
\nInstall the git package. The package should contain "git daemon":
\n# pkg_add git\nEnable the daemon:
\n# rcctl enable gitdaemon\nSet the gitdaemon service flags to use the src directory and use all the\navailable repositories in this directory. The command-line flags "--export-all"\nexports all repositories in the base path. Alternatively you can use the\n"git-daemon-export-ok" file (see the git-daemon man page).
\n# rcctl set gitdaemon flags --export-all --base-path="/home/src/src"\nTo configure the service to run as the user _gitdaemon:
\n# rcctl set gitdaemon user _gitdaemon\nTo run the daemon directly as the user _gitdaemon (without dropping privileges\nfrom root to the user) set the following flags in /etc/rc.d/gitdaemon:
\ndaemon_flags="--user=_gitdaemon"\nWhich will also avoid this warning while cloning:
\n"can't access /root/.git/config"\nNow start the daemon:
\n# rcctl start gitdaemon\nTo test and clone the repository do:
\n$ git clone git://yourdomain/someproject\nif you skipped the optional git-daemon installation then just clone via SSH:
\n$ git clone ssh://youraccount@yourdomain:/home/src/src/someproject\nWhen cloning via SSH make sure to setup private/public key authentication for\nsecurity and convenience.
\nYou should also make sure the firewall allows connections to the services like\nthe git daemon, HTTPd or SSH, for example using OpenBSD pf something like this\ncan be set in /etc/pf.conf:
\ntcp_services="{ ssh, gopher, http, https, git }"\npass in on egress proto tcp from any to (egress) port $tcp_services\nAdd the repository as a remote:
\n$ git remote add myremote ssh://youraccount@yourdomain:/home/src/src/someproject\nThen push the changes:
\n$ git push myremote master:master\nSometimes it's nice to browse the git history log of the repository in a web\nbrowser or some other program without having to look at the local repository.
\nIt's also possible with these tools to generate an Atom feed and then use a\nRSS/Atom reader to track the git history:
\nMy sfeed program can be used as a RSS/Atom reader.
\nUsing git hooks you can setup automated triggers, for example when pushing to a\nrepository. Some useful examples can be:
\nLast modification on
\n\tThis describes how to setup an OpenBSD SPARC64 VM in QEMU.
\nTo create a 5GB disk image:
\nqemu-img create -f qcow2 fs.qcow2 5G\nIn this guide we'll use the installation ISO to install OpenBSD. Make sure to\ndownload the latest (stable) OpenBSD ISO, for example install62.iso.
\nStart the VM:
\n#!/bin/sh\nLC_ALL=C QEMU_AUDIO_DRV=none \\\nqemu-system-sparc64 \\\n\t-machine sun4u,usb=off \\\n\t-realtime mlock=off \\\n\t-smp 1,sockets=1,cores=1,threads=1 \\\n\t-rtc base=utc \\\n\t-m 1024 \\\n\t-boot c \\\n\t-drive file=fs.qcow2,if=none,id=drive-ide0-0-1,format=qcow2,cache=none \\\n\t-cdrom install62.iso \\\n\t-device ide-hd,bus=ide.0,unit=0,drive=drive-ide0-0-1,id=ide0-0-1 \\\n\t-msg timestamp=on \\\n\t-serial pty -nographic \\\n\t-net nic,model=ne2k_pci -net user\nThe VM has the following properties:
\nFrom your host connect to the serial device indicated by QEMU, for example:
\n(qemu) 2017-11-19T15:14:20.884312Z qemu-system-sparc64: -serial pty: char device redirected to /dev/ttyp0 (label serial0)\nThen you can use the serial terminal emulator cu to attach:
\ncu -l /dev/ttyp0\nAnother option could be using the simple terminal(st) from suckless.
\nst -l /dev/ttyp0\nusing cu to detach the cu(1) man page says:
\nTyped characters are normally transmitted directly to the remote machine (which\ndoes the echoing as well). A tilde ('~') appearing as the first character of a\nline is an escape signal; the following are recognized:\n\n ~^D or ~. Drop the connection and exit. Only the connection is\n the login session is not terminated.\nOn boot you have to type:
\nroot device: wd0a\nfor swap use the default (wd0b) Press enter\nAutomatic network configuration using DHCP
\necho "dhcp" > /etc/hostname.ne0\nTo bring up the interface (will be automatic on the next boot):
\nsh /etc/netstart\nAdd a mirror to /etc/installurl for package installation. Make sure to lookup\nthe most efficient/nearby mirror site on the OpenBSD mirror page.
\necho "https://ftp.hostserver.de/pub/OpenBSD" > /etc/installurl\nLast modification on
\n\tTscrape is a Twitter web scraper and archiver.
\nTwitter removed the functionality to follow users using a RSS feed without\nauthenticating or using their API. With this program you can format tweets in\nany way you like relatively anonymously.
\nFor more (up-to-date) information see the README file.
\ngit clone git://git.codemadness.org/tscrape\nYou can browse the source-code at:
\n\nReleases are available at:
\n\nOutput format examples:
\n html https://www.codemadness.org/tscrape.html Hiltjo 1506211200 jsdatatable: a small datatable Javascript https://www.codemadness.org/datatable.htmlLast modification on
\n\tThis is a small datatable Javascript with no dependencies.
\nIt was created because all the other datatable scripts suck balls.
\nMost Javascripts nowadays have a default dependency on jQuery, Bootstrap or\nother frameworks.
\njQuery adds about 97KB and Bootstrap adds about 100KB to your scripts and CSS\nas a dependency. This increases the CPU, memory and bandwidth consumption and\nlatency. It also adds complexity to your scripts.
\njQuery was mostly used for backwards-compatibility in the Internet Explorer\ndays, but is most often not needed anymore. It contains functionality to query\nthe DOM using CSS-like selectors, but this is now supported with for example\ndocument.querySelectorAll. Functionality like a JSON parser is standard\navailable now: JSON.parse().
\nAll sizes are not "minified" or gzipped.
\nName | Total | JS | CSS | Images | jQuery\n---------------------------------+---------+---------+-------+--------+-------\njsdatatable | 12.9KB | 9.1KB | 2.5KB | 1.3KB | -\ndatatables.net (without plugins) | 563.4KB | 449.3KB | 16KB | 0.8KB | 97.3KB\njdatatable | 154.6KB | 53KB | 1KB | 3.3KB | 97.3KB\nOf course jsdatatable has less features (less is more!), but it does 90% of\nwhat's needed. Because it is so small it is also much simpler to understand and\nextend with required features if needed.
\nSee also:\nThe website obesity crisis
\ngit clone git://git.codemadness.org/jscancer\nYou can browse the source-code at:
\n\nIt is in the datatable directory.
\nReleases are available at:
\n\nSee example.html for an example. A stylesheet file datatable.css is also\nincluded, it contains the icons as embedded images.
\nA table should have the classname "datatable" set, it must contain a <thead>\nfor the column headers (<td> or <th>) and <tbody> element for the data. The\nminimal code needed for a working datatable:
\n<html>\n<body>\n<input class="filter-text" /><!-- optional -->\n<table class="datatable">\n\t<thead><!-- columns -->\n\t\t<tr><td>Click me</td></tr>\n\t</thead>\n\t<tbody><!-- data -->\n\t\t<tr><td>a</td></tr>\n\t\t<tr><td>b</td></tr>\n\t</tbody>\n</table>\n<script type="text/javascript" src="datatable.js"></script>\n<script type="text/javascript">var datatables = datatable_autoload();</script>\n</body>\n</html>\nThe following column attributes are supported:
\nBy default only parsing for the types: date, float, int and string are\nsupported, but other types can be easily added as a function with the name:\ndatatable_parse_<typename>(). The parse functions parse the data-value\nattribute when set or else the cell content (in order). Because of this\nbehaviour you can set the actual values as the data-value attribute and use the\ncell content for display. This is useful to display and properly sort\nlocale-aware currency, datetimes etc.
\nFiltering will be done case-insensitively on the cell content and when set also\non the data-value attribute. The filter string is split up as tokens separated\nby space. Each token must match at least once per row to display it.
\nSorting is done on the parsed values by default with the function:\ndatatable_sort_default(). To change this you can set a customname string on\nthe data-sort attribute on the column which translates to the function:\ndatatable_sort_<customname>().
\nIn some applications locale values are used, like for currency, decimal numbers\ndatetimes. Some people also like to use icons or extended HTML elements inside\nthe cell. Because jsdatatable sorts on the parsed value (see section PARSING)\nit is possible to sort on the data-value attribute values and use the cell\ncontent for display.
\nFor example:
\nTo update data dynamically see example-ajax.html for an example how to do this.
\nFor the below example to work you need to have Javascript enabled.
\n html https://www.codemadness.org/datatable.html Hiltjo 1501804800 Stagit-gopher: a static git page generator for gopher https://www.codemadness.org/stagit-gopher.htmlLast modification on
\n\tstagit-gopher is a static page generator for Gopher. It creates the pages as\nstatic geomyidae .gph files. stagit-gopher is a modified version from the\nHTML version of stagit.
\nRead the README for more information about it.
\nI also run a gopherhole and stagit-gopher, you can see how it looks here:\ngopher://codemadness.org/1/git/
\nsacc is a good Gopher client to view it.
\nThis is by design, just use git locally.
\ngit clone git://git.codemadness.org/stagit-gopher\nYou can browse the source-code at:
\n\nReleases are available at:
\nLast modification on
\n\tSaait is the most boring static HTML page generator.
\nMeaning of saai (dutch): boring. Pronunciation: site
\nRead the README for more information about it.
\nI used to use shellscripts to generate the static pages, but realised I\nwanted a small program that works on each platform consistently. There are\nmany incompatibilities or unimplemented features in base tools across different\nplatforms: Linux, UNIX, Windows.
\nThis site is created using saait.
\ngit clone git://git.codemadness.org/saait\nYou can browse the source-code at:
\n\nReleases are available at:
\n\nBelow is the saait(1) man page, which includes usage examples.
\n\nSAAIT(1) General Commands Manual SAAIT(1)\n\nNAME\n saait the most boring static page generator\n\nSYNOPSIS\n saait [-c configfile] [-o outputdir] [-t templatesdir] pages...\n\nDESCRIPTION\n saait writes HTML pages to the output directory.\n\n The arguments pages are page config files, which are processed in the\n given order.\n\n The options are as follows:\n\n -c configfile\n The global configuration file, the default is "config.cfg". Each\n page configuration file inherits variables from this file. These\n variables can be overwritten per page.\n\n -o outputdir\n The output directory, the default is "output".\n\n -t templatesdir\n The templates directory, the default is "templates".\n\nDIRECTORY AND FILE STRUCTURE\n A recommended directory structure for pages, although the names can be\n anything:\n pages/001-page.cfg\n pages/001-page.html\n pages/002-page.cfg\n pages/002-page.html\n\n The directory and file structure for templates must be:\n templates/<templatename>/header.ext\n templates/<templatename>/item.ext\n templates/<templatename>/footer.ext\n\n The following filename prefixes are detected for template blocks and\n processed in this order:\n\n "header."\n Header block.\n\n "item."\n Item block.\n\n "footer."\n Footer block.\n\n The files are saved as output/<templatename>, for example\n templates/atom.xml/* will become: output/atom.xml. If a template block\n file does not exist then it is treated as if it was empty.\n\n Template directories starting with a dot (".") are ignored.\n\n The "page" templatename is special and will be used per page.\n\nCONFIG FILE\n A config file has a simple key=value configuration syntax, for example:\n\n # this is a comment line.\n filename = example.html\n title = Example page\n description = This is an example page\n created = 2009-04-12\n updated = 2009-04-14\n\n The following variable names are special with their respective defaults:\n\n contentfile\n Path to the input content filename, by default this is the path\n of the config file with the last extension replaced to ".html".\n\n filename\n The filename or relative file path for the output file for this\n page. By default the value is the basename of the contentfile.\n The path of the written output file is the value of filename\n appended to the outputdir path.\n\n A line starting with # is a comment and is ignored.\n\n TABs and spaces before and after a variable name are ignored. TABs and\n spaces before a value are ignored.\n\nTEMPLATES\n A template (block) is text. Variables are replaced with the values set\n in the config files.\n\n The possible operators for variables are:\n\n $ Escapes a XML string, for example: < to the entity <.\n\n # Literal raw string value.\n\n % Insert contents of file of the value of the variable.\n\n For example in a HTML item template:\n\n <article>\n <header>\n <h1><a href="">${title}</a></h1>\n <p>\n <strong>Last modification on </strong>\n <time datetime="${updated}">${updated}</time>\n </p>\n </header>\n %{contentfile}\n </article>\n\nEXIT STATUS\n The saait utility exits 0 on success, and >0 if an error occurs.\n\nEXAMPLES\n A basic usage example:\n\n 1. Create a directory for a new site:\n\n mkdir newsite\n\n 2. Copy the example pages, templates, global config file and example\n stylesheets to a directory:\n\n cp -r pages templates config.cfg style.css print.css newsite/\n\n 3. Change the current directory to the created directory.\n\n cd newsite/\n\n 4. Change the values in the global config.cfg file.\n\n 5. If you want to modify parts of the header, like the navigation menu\n items, you can change the following two template files:\n templates/page/header.html\n templates/index.html/header.html\n\n 6. Create any new pages in the pages directory. For each config file\n there has to be a corresponding HTML file. By default this HTML\n file has the path of the config file, but with the last extension\n (".cfg" in this case) replaced to ".html".\n\n 7. Create an output directory:\n\n mkdir -p output\n\n 8. After any modifications the following commands can be used to\n generate the output and process the pages in descending order:\n\n find pages -type f -name '*.cfg' -print0 | sort -zr | xargs -0 saait\n\n 9. Copy the modified stylesheets to the output directory also:\n\n cp style.css print.css output/\n\n 10. Open output/index.html locally in your webbrowser to review the\n changes.\n\n 11. To synchronize files, you can securely transfer them via SSH using\n rsync:\n\n rsync -av output/ user@somehost:/var/www/htdocs/\n\nTRIVIA\n The most boring static page generator.\n\n Meaning of saai (dutch): boring, pronunciation of saait: site\n\nSEE ALSO\n find(1), sort(1), xargs(1)\n\nAUTHORS\n Hiltjo Posthuma <hiltjo@codemadness.org>\nLast modification on
\n\tstagit is a static page generator for git.
\nRead the README for more information about it.
\nMy git repository uses stagit, you can see how it looks here:\nhttps://codemadness.org/git/
\nIn these cases it is better to use cgit or\npossibly change stagit to run as a CGI program.
\nThis is by design, just use git locally.
\ngit clone git://git.codemadness.org/stagit\nYou can browse the source-code at:
\n\nReleases are available at:
\n html https://www.codemadness.org/stagit.html Hiltjo 1436054400 OpenBSD httpd, slowcgi and cgit https://www.codemadness.org/openbsd-httpd-and-cgit.htmlLast modification on
\n\tThis is a guide to get cgit working with\nOpenBSD httpd(8) and\nslowcgi(8) in base. OpenBSD httpd is very simple to setup, but nevertheless\nthis guide might help someone out there.
\nInstall the cgit package:
\n# pkg_add cgit\nor build it from ports:
\n# cd /usr/ports/www/cgit && make && make install\nAn example of httpd.conf(5):\nhttpd.conf.
\nBy default the slowcgi UNIX domain socket is located at:\n/var/www/run/slowcgi.sock. For this example we use the defaults.
\nThe cgit binary should be located at: /var/www/cgi-bin/cgit.cgi (default).
\ncgit uses the $CGIT_CONFIG environment variable to locate its config. By\ndefault on OpenBSD this is set to /conf/cgitrc (chroot), which is\n/var/www/conf/cgitrc. An example of the cgitrc file is here: cgitrc.
\nIn this example the cgit cache directory is set to /cgit/cache (chroot), which\nis /var/www/cgit/cache. Make sure to give this path read and write permissions\nfor cgit (www:daemon).
\nIn the example the repository path (scan-path) is set to /htdocs/src (chroot),\nwhich is /var/www/htdocs/src.
\nThe footer file is set to /conf/cgit.footer. Make sure this file exists or you\nwill get warnings:
\n# >/var/www/conf/cgit.footer\nMake sure cgit.css (stylesheet) and cgit.png (logo) are accessible, by default:\n/var/www/cgit/cgit.{css,png} (location can be changed in httpd.conf).
\nTo support .tar.gz snapshots a static gzip binary is required in the chroot\n/bin directory:
\ncd /usr/src/usr.bin/compress\nmake clean && make LDFLAGS="-static -pie"\ncp obj/compress /var/www/bin/gzip\nEnable the httpd and slowcgi services to automatically start them at boot:
\n# rcctl enable httpd slowcgi\nStart the services:
\n# rcctl start httpd slowcgi\nLast modification on
\n\tUpdate: as of 2020-05-06: I stopped maintaining it.\nTwitch now requires OAUTH and 2-factor authentication. It requires me to expose\npersonal information such as my phone number.
\nUpdate: as of ~2020-01-03: I rewrote this application from Golang to C.\nThe Twitch Kraken API used by the Golang version was deprecated. It was\nrewritten to use the Helix API.
\nThis program/script allows to view streams in your own video player like so the\nbloated Twitch interface is not needed. It is written in C.
\ngit clone git://git.codemadness.org/frontends\nYou can browse the source-code at:
\n html https://www.codemadness.org/twitch-interface.html Hiltjo 1393718400 Userscript: focus input field https://www.codemadness.org/userscript-focus-input-field.htmlLast modification on
\n\tThis is an userscript I wrote a while ago which allows to focus the first input\nfield on a page with ctrl+space. This is useful if a site doesn't specify the\nautofocus attribute for an input field and you don't want to switch to it using\nthe mouse.
\nDownload userscript input_focus.user.js
html https://www.codemadness.org/userscript-focus-input-field.html Hiltjo 1361404800 Userscript: Youtube circumvent age verification https://www.codemadness.org/userscript-youtube-circumvent-age-verification.htmlLast modification on
\n\tThis is an userscript I wrote a while ago which circumvents requiring to login\nwith an account on Youtube if a video requires age verification.
\nNote: this is an old script and does not work anymore.
\nDownload userscript Youtube_circumvent_sign_in.user.js
html https://www.codemadness.org/userscript-youtube-circumvent-age-verification.html Hiltjo 1350777600 Userscript: block stupid fonts https://www.codemadness.org/userscript-block-stupid-fonts.htmlLast modification on
\n\tThis is an userscript I wrote a while ago which white-lists fonts I like and\nblocks the rest. The reason I made this is because I don't like the\ninconsistency of custom fonts used on a lot of websites.
\nDownload userscript Block_stupid_fonts_v1.2.user.js
\nOld version: Download userscript Block_stupid_fonts.user.js
html https://www.codemadness.org/userscript-block-stupid-fonts.html Hiltjo 1301616000 Sfeed: simple RSS and Atom parser https://www.codemadness.org/sfeed-simple-feed-parser.htmlLast modification on
\n\tSfeed is a RSS and Atom parser (and some format programs).
\nIt converts RSS or Atom feeds from XML to a TAB-separated file. There are\nformatting programs included to convert this TAB-separated format to various\nother formats. There are also some programs and scripts included to import and\nexport OPML and to fetch, filter, merge and order feed items.
\nFor the most (up-to-date) information see the README.
\ngit clone git://git.codemadness.org/sfeed\nYou can browse the source-code at:
\n\nReleases are available at:
\n\n$ make\n# make install\n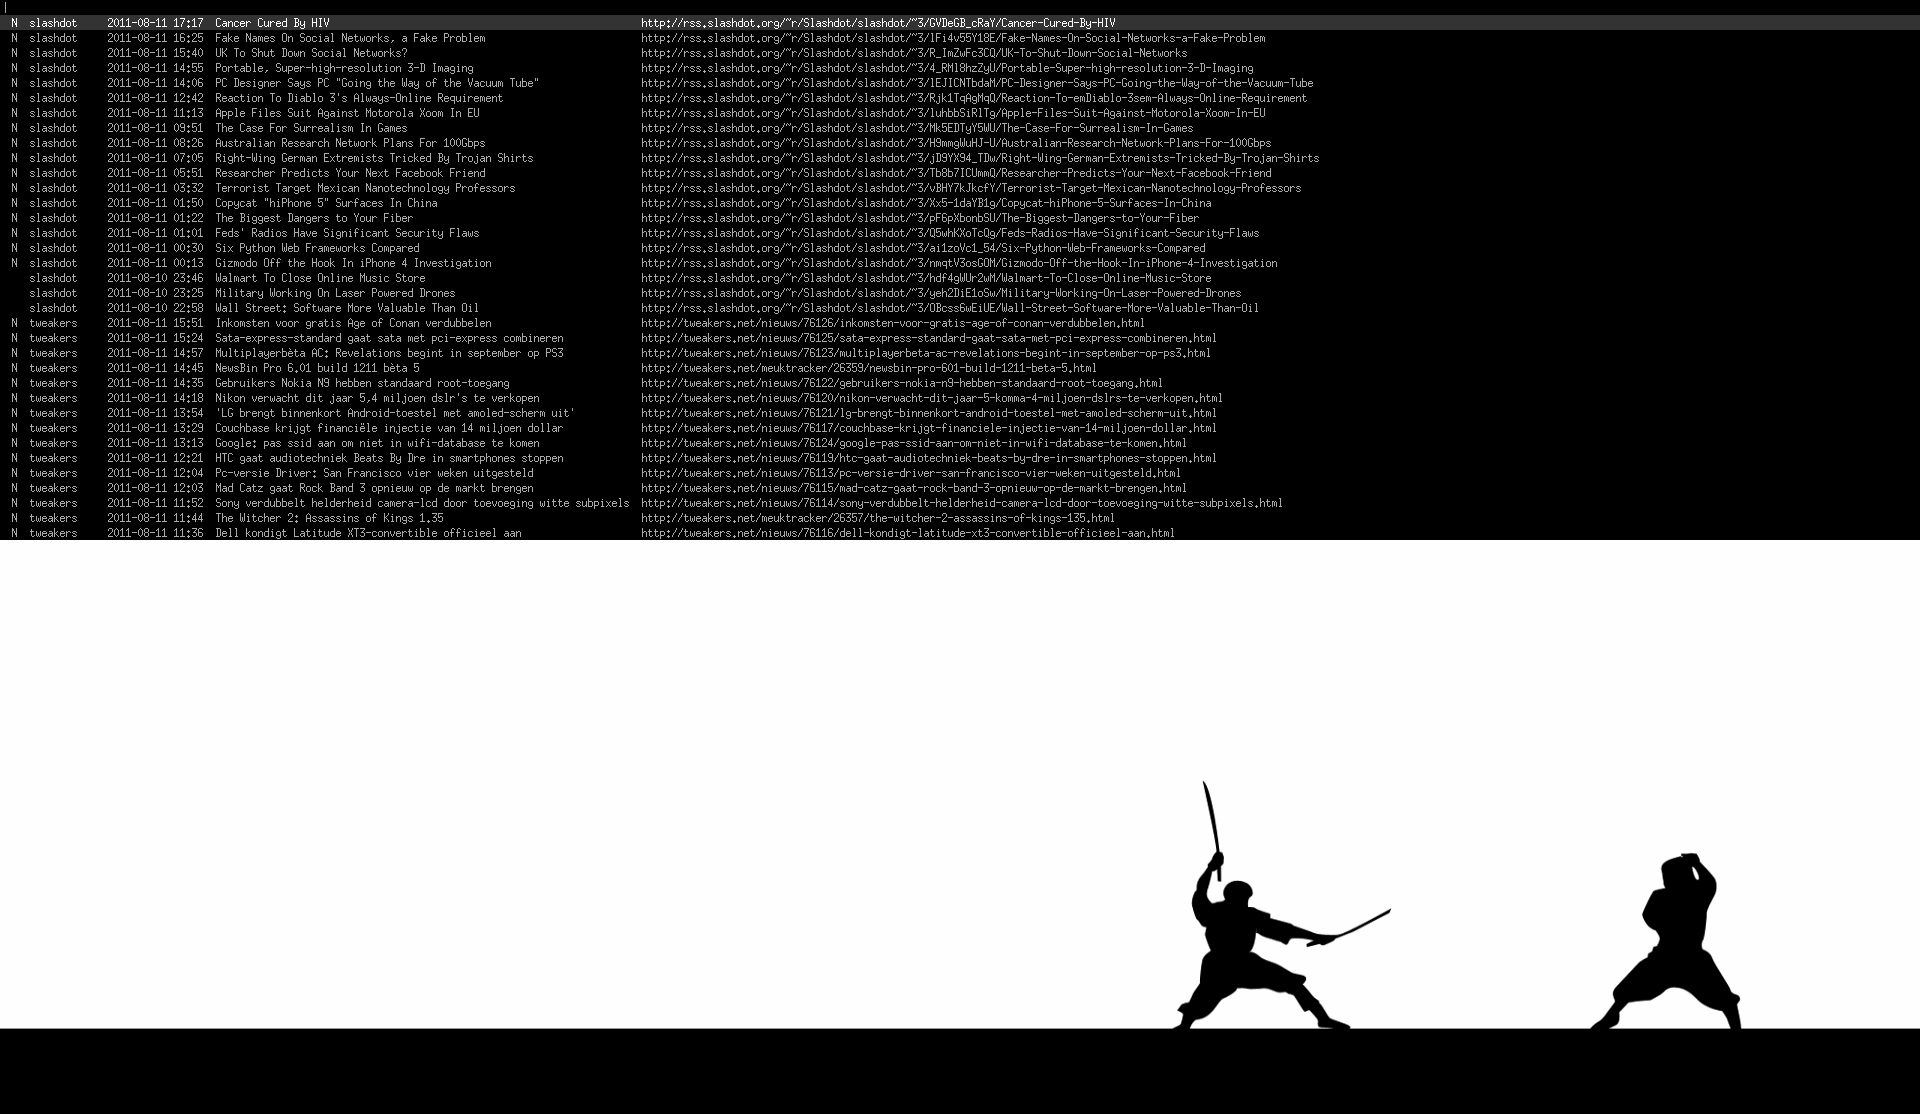
The above screenshot uses the sfeed_plain format program with dmenu. This\nprogram outputs the feed items in a compact way per line as plain-text to\nstdout. The dmenu program reads these lines from stdin and displays them as a\nX11 list menu. When an item is selected in dmenu it prints this item to stdout.\nA simple written script can then filter for the URL in this output and do some\naction, like opening it in some browser or open a podcast in your music player.
\nFor example:
\n#!/bin/sh\nurl=$(sfeed_plain "$HOME/.sfeed/feeds/"* | dmenu -l 35 -i | \\\n\tsed -n 's@^.* \\([a-zA-Z]*://\\)\\(.*\\)$@\\1\\2@p')\ntest -n "${url}" && $BROWSER "${url}"\nHowever this is just one way to format and interact with feed items.\nSee also the README for other practical examples.
\nBelow are some examples of output that are supported by the included format\nprograms:
\nThere is also a curses UI front-end, see the page sfeed_curses.\nIt is now part of sfeed.
\nHere are some videos of other people showcasing some of the functionalities of\nsfeed, sfeed_plain and sfeed_curses. To the creators: thanks for making these!
\nLast modification on
\n\tThis is a dark theme I made for vim. This is a theme I personally used for\nquite a while now and over time tweaked to my liking. It is made for gvim, but\nalso works for 16-colour terminals (with small visual differences). The\nrelaxed.vim file also has my .Xdefaults file colours listed at the top for\n16+-colour terminals on X11.
\nIt is inspired by the "desert" theme available at\nhttps://www.vim.org/scripts/script.php?script_id=105, although I removed the\ncursive and bold styles and changed some colours I didn't like.
\n
Last modification on
\n\tSeturgent is a small utility to set an application its urgency hint. For most\nwindowmanager's and panel applications this will highlight the application and\nwill allow special actions.
\n git clone git://git.codemadness.org/seturgent\nYou can browse the source-code at:
\n\nReleases are available at:
\n html https://www.codemadness.org/seturgent-set-urgency-hints-for-x-applications.html Hiltjo 1281571200 DWM-hiltjo: my windowmanager configuration https://www.codemadness.org/dwm-hiltjo-my-windowmanager-configuration.htmlLast modification on
\n\tDWM is a very minimal windowmanager. It has the most essential features I\nneed, everything else is "do-it-yourself" or extending it with the many\navailable patches. The vanilla version is less than 2000 SLOC. This makes it\neasy to understand and modify it.
\nI really like my configuration at the moment and want to share my changes. Some\nof the features listed below are patches from suckless.org I applied, but there\nare also some changes I made.
\nThis configuration is entirely tailored for my preferences of course.
\ngit clone -b hiltjo git://git.codemadness.org/dwm\n
Last modification on
\n\tToday I was doing some web development and wanted to see all the rules in a\nstylesheet (CSS) that were not used for the current document. I wrote the\nfollowing Javascript code which you can paste in the Firebug console and run:
\n(function() {\n\tfor (var i=0;i<document.styleSheets.length;i++) {\n\t\tvar rules = document.styleSheets[i].cssRules || [];\n\t\tvar sheethref = document.styleSheets[i].href || 'inline';\n\t\tfor (var r=0;r<rules.length;r++)\n\t\t\tif (!document.querySelectorAll(rules[r].selectorText).length)\n\t\t\t\tconsole.log(sheethref + ': "' + rules[r].selectorText + '" not found.');\n\t}\n})();\nThis will output all the (currently) unused CSS rules per selector, the output can be for example:
\nhttp://www.codemadness.nl/blog/wp-content/themes/codemadness/style.css: "fieldset, a img" not found.\nhttp://www.codemadness.nl/blog/wp-content/themes/codemadness/style.css: "#headerimg" not found.\nhttp://www.codemadness.nl/blog/wp-content/themes/codemadness/style.css: "a:hover" not found.\nhttp://www.codemadness.nl/blog/wp-content/themes/codemadness/style.css: "h2 a:hover, h3 a:hover" not found.\nhttp://www.codemadness.nl/blog/wp-content/themes/codemadness/style.css: ".postmetadata-center" not found.\nhttp://www.codemadness.nl/blog/wp-content/themes/codemadness/style.css: ".thread-alt" not found.\nJust a trick I wanted to share, I hope someone finds this useful :)
\nFor webkit-based browsers you can use "Developer Tools" and use "Audits" under\n"Web Page Performance" it says "Remove unused CSS rules". For Firefox there is\nalso Google Page Speed: https://code.google.com/speed/page-speed/ this adds\nan extra section under Firebug.
\nTested on Chrome and Firefox.
html https://www.codemadness.org/query-unused-css-rules-on-current-document-state.html Hiltjo 1246752000 Driconf: enabling S3 texture compression on Linux https://www.codemadness.org/driconf-enabling-s3-texture-compression-on-linux.htmlLast modification on
\n\tUpdate: the DXTC patent expired on 2018-03-16, many distros enable this by\ndefault now.
\nS3TC (also known as DXTn or DXTC) is a patented lossy texture compression\nalgorithm. See: https://en.wikipedia.org/wiki/S3TC for more detailed\ninformation. Many games use S3TC and if you use Wine to play games you\ndefinitely want to enable it if your graphics card supports it.
\nBecause this algorithm was patented it is disabled by default on many Linux\ndistributions.
\nTo enable it you can install the library "libtxc" if your favorite OS has not\ninstalled it already.
\nFor easy configuration you can install the optional utility DRIconf, which you\ncan find at: https://dri.freedesktop.org/wiki/DriConf. DriConf can safely be\nremoved after configuration.
\nInstall libtxc_dxtn:
\nArchLinux:\n
# pacman -S libtxc_dxtn\nDebian:\n
# aptitude install libtxc-dxtn-s2tc0\nInstall driconf (optional):
\nArchLinux:
\n# pacman -S driconf\nDebian:
\n# aptitude install driconf\nRun driconf and enable S3TC:
\n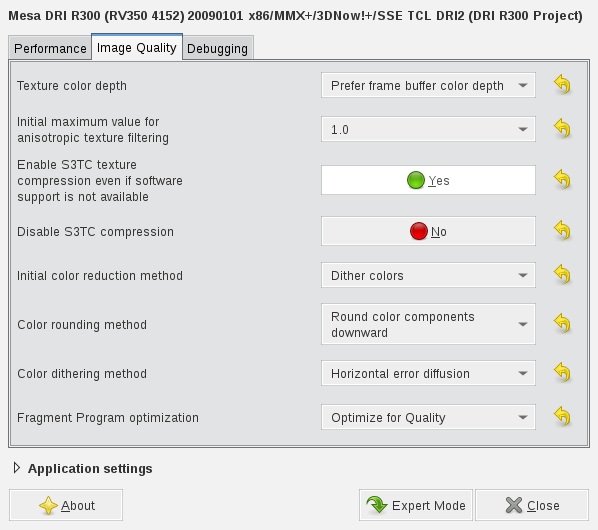
Last modification on
\n\tNOTE: this guide is obsolete, a working driver is now included in the Linux\nkernel tree (since Linux 2.6.31)
\nA USB to powerline bridge is a network device that instead of using an ordinary\nEthernet cable (CAT5 for example) or wireless LAN it uses the powerlines as a\nnetwork to communicate with similar devices. A more comprehensive explanation\nof what it is and how it works you can find here:\nhttps://en.wikipedia.org/wiki/IEEE_1901.
\nKnown products that use the Intellon 51x1 chipset:
\nTo check if your device is supported:
\n$ lsusb | grep -i 09e1\nBus 001 Device 003: ID 09e1:5121 Intellon Corp.\nIf the vendor (09e1) and product (5121) ID match then it's probably supported.
\nGet drivers from the official site:\nhttp://www.devolo.co.uk/consumer/downloads-44-microlink-dlan-usb.html?l=en or\nmirrored here.\nThe drivers from the official site were/are more up-to-date.
\nExtract them:
\n$ tar -xzvf dLAN-linux-package-v4.tar.gz\nGo to the extracted directory and compile them:
\n$ ./configure\n$ make\nDepending on the errors you got you might need to download and apply\nmy patch:
\n$ cd dLAN-linux-package-v4/ (or other path to the source code)\n$ patch < int51x1.patch\nTry again:
\n$ ./configure\n$ make\nIf that failed try:
\n$ ./configure\n$ KBUILD_NOPEDANTIC=1 make\nIf that went OK install the drivers (as root):
\n# make install\nCheck if the "devolo_usb" module is loaded:
\n$ lsmod | grep -i devolo_usb\nIf it shows up then it's loaded. Now check if the interface is added:
\n$ ifconfig -a | grep -i dlanusb\ndlanusb0 Link encap:Ethernet HWaddr 00:12:34:56:78:9A\nIt is assumed you use a static IP, otherwise you can just use your DHCP client\nto get an unused IP address from your DHCP server. Setting up the interface is\ndone like this (change the IP address and netmask accordingly if it's\ndifferent):
\n# ifconfig dlanusb0 192.168.2.12 netmask 255.255.255.0\nTry to ping an IP address on your network to test for a working connection:
\n$ ping 192.168.2.1\nPING 192.168.2.1 (192.168.2.1) 56(84) bytes of data.\n64 bytes from 192.168.2.1: icmp_seq=1 ttl=30 time=2.49 ms\n64 bytes from 192.168.2.1: icmp_seq=2 ttl=30 time=3.37 ms\n64 bytes from 192.168.2.1: icmp_seq=3 ttl=30 time=2.80 ms\n--- 192.168.2.1 ping statistics ---\n3 packets transmitted, 3 received, 0% packet loss, time 2005ms\nrtt min/avg/max/mdev = 2.497/2.891/3.374/0.368 ms\nYou can now set up a network connection like you normally do with any Ethernet\ndevice. The route can be added like this for example:
\n# route add -net 0.0.0.0 netmask 0.0.0.0 gw 192.168.2.1 dlanusb0\nChange the IP address of your local gateway accordingly. Also make sure your\nnameserver is set in /etc/resolv.conf, something like:
\nnameserver 192.168.2.1\nTest your internet connection by doing for example:
\n$ ping codemadness.org\nPING codemadness.org (64.13.232.151) 56(84) bytes of data.\n64 bytes from acmkoieeei.gs02.gridserver.com (64.13.232.151): icmp_seq=1 ttl=52 time=156 ms\n64 bytes from acmkoieeei.gs02.gridserver.com (64.13.232.151): icmp_seq=2 ttl=52 time=156 ms\n64 bytes from acmkoieeei.gs02.gridserver.com (64.13.232.151): icmp_seq=3 ttl=52 time=155 ms\n--- codemadness.org ping statistics ---\n3 packets transmitted, 3 received, 0% packet loss, time 1999ms\nrtt min/avg/max/mdev = 155.986/156.312/156.731/0.552 ms\nIf this command failed you probably have not setup your DNS/gateway properly.\nIf it worked then good for you :)
\nLast modification on
\n\tDisclaimer:\nSome (including myself) may find some of these hints/exploits cheating. This\nguide is just for educational and fun purposes. Some of these hints/tips apply\nto Gothic 2 as well. I got the meat exploit from a guide somewhere on the\ninternet I can't recall where, anyway kudos to that person. Some of the\nexploits I discovered myself.
\nGothic supports widescreen resolutions with a small tweak, add the following\ntext string as a command-line argument:
\n-zRes:1920,1200,32\nThis also works for Gothic 2. Here 1920 is the width, 1200 the height and 32\nthe bits per pixel, change this to your preferred resolution.
\nDisable steam overlay. If that doesn't work rename GameOverlayRenderer.dll in\nyour steam folder to _GameOverlayRenderer.dll. I strongly recommend to buy the\nbetter version from GOG.com. The GOG version has no DRM and allows easier\nmodding, it also allows playing in most published languages: German, English,\nPolish, furthermore it has some original artwork and soundtrack included.
\nYou can install the Gothic playerkit and patches to remove the Steam DRM.
\nWorldOfGothic playerkit patches:
\nIf you're like me and have played the English version many times, but would\nlike to hear the (original) German voice audio or if you would like to play\nwith different audio than you're used to, then you can copy the speech.vdf file\nof your preferred version to your game files. Optionally turn on subtitles.\nI've used this to play the English version of Gothic with the original German\nvoice audio and English subtitles.\nThis works best with the version from GOG as it allows easier modding.
\nAt night attack Huno the smith in the Old Camp and steal all his steel. Then\nmake some weapons and sell them with a merchant. When you ask Huno about\nblacksmith equipment it will respawn with 5 of each kind of steel. This is also\na fairly good starting weapon (requires 20 strength). Also his chest located\nnear the sharpening stone and fire contains some steel as well, lock-pick it.\nThe combination is: RRLRLL. The chest contains at least 20 raw steel, forge it\nto get 20 crude swords which you can sell for 50 ore each to a merchant. This\nwill generate some nice starting money (1000+ ore) :)
\nThis tip is useful for getting pretty good starting weapons.
\nBefore entering the castle itself drop your ore (Left control + down for me)\nin front of it. This will ensure when you get caught (and you probably will ;))\nno ore will get stolen by the guards. Now use the "slip past guard" technique\ndescribed below and you should be able to get into Gomez his castle. Run to the\nleft where some weapons are stored. Now make sure you at least steal the best\nweapon (battle sword) and steal as much as you can until you get whacked. I\nusually stand in the corner since that's where the best weapons are (battle\nsword, judgement sword, etc). You'll now have some nice starting weapon(s) and\nthe good thing is they require very little attributes (about 13 strength).
\nLocation: screenshot
\nIn the New Camp go to the mine and talk to Swiney at the bottom of "The\nHollow". Ask who he is and then ask to join the scrapers. He will give you a\n"Diggers dress" worth 250 ore. It has the following stats: + 10 against\nweapons. + 5 against fire. This will also give you free entrance to the bar in\nthe New Camp.
\nIn the quest from Lefty you will be assigned to get water bottles from the\nrice lord. He will give you infinite amounts of water bottles, in batches of\n12.
\nIn the Old Camp in the main castle there are at least 3 chests with valuable\nitems that don't require a key:
\nMiddle right side (looking from the entrance), 1 chest:\n
Left side, 1 chest:\n
Right side, 2 chests with:\n
In the swamp-weed harvest quest you must get swamp-weed for a guru. After this\nquest you can get the harvest again, but you can keep the harvest without\nconsequences.
\nThis exploit is really simple, just draw your weapon before you're "targeted"\nby the guard and run past them, this bypasses the dialog sequence. When you're\njust out of their range holster your weapon again, so the people around won't\nget pissed off.
\nWorks really well on the guards in front of the Old camp's castle, Y'Berrion\ntemplars and New Camp mercenaries near the Water magicians, just to name a few.
\n\nGo to a pan and focus / target it so it says "frying pan" or similar. Now open\nyour inventory and select the meat. Now cook the meat (for me Left Control +\nArrow up). The inventory should remain open. You'll now have twice as much meat\nas you had before. Do this a few times and you'll have a lot of meat, easy for\ntrading with ore/other items as well. This exploit does not work with the\ncommunity patch applied.
\nYou can glitch through walls by strafing into them. Then when the player is\npartially collided into a door or wall you can jump forward to glitch through\nit.
\n\nWhen you fall or jump from where you usually get fall damage you can do the\nfollowing trick: slightly before the ground use left or right strafe. This\nworks because it resets the falling animation. There are also other ways to\nachieve the same thing cancelling the falling animation, such as attacking with\na weapon in the air.
\n\nYou get an additional 750 exp (from Lares) when you forge the letter in the new\ncamp and then give it to Diego. You can still join both camps after this.
\nAn easy way to get more experience is to let the skeleton mages summon as much\nskeletons as they can, instead of rushing to kill the summoner immediately.\nAfter you have defeated all of them: kill the skeleton mage.
\nWhen you want to get the maximum power at the end of the game you should save\nup the items that give you a permanent boost. Teachers of strength, dexterity\nand mana won't train over 100 of each skill. However using potions and quest\nrewards you can increase this over 100.
\nYou should also look out for the following:
\nLearn to get extra force into your punch from Horatio (strength +5, this\ncan't be done after level 100 strength). Talking to Jeremiah in the New Camp\nbar unlocks the dialog option to train strength at Horatio.
\nSmoke the strongest non-quest joint (+2 mana).
\nThis one is really obvious, but I would like to point out the mummy's on each\nside where Xardas is located have lots and I mean lots of permanent potions.\nThis will give you a nice boost before the end battle.
\nLocation, left and right corridor in the Sleeper temple: screenshot
\nMummies, you can loot them: screenshot
Always pick the permanent potion as a reward for quests when you can, for\nexample the quest for delivering the message to the High Fire magicians (mana\npotion) or the one for fetching the almanac for the Sect Camp. Don't forget to\npick up the potions from Riordian the water magician when you're doing the\nfocus stones quest, it contains a strength and dexterity potion (+3).
\nIn the last chapters the blacksmith Stone from the Old Camp is captured If you\nsave him from the prison cell in the Old Camp the reward will have a few\noptions. One of the options is improving the Ancient Ore armour.
\nLocation: in a cave near bloodhounds near the mountain fort.
\nIt can be reached from a path from the swamp camp up to the mountain.\nWatch out for the bloodhounds. They can instantly kill you in the early game.
Location: screenshot
\nStats: screenshot
Stats:\n
It has very low strength stat requirement and has high damage for the early\ngame chapters. A downside is the lower weapon swing range.\nIt is also a decent weapon against stone golems.
\nLocation: near Xardas his tower.
\nWatch out for a group of Biters lurking there.
Location: screenshot
\nStats: screenshot
Stats:\n
It has a relatively low strength requirements and is available in game chapter\n1 or could be sold for a decent amount.
\nIf you want to talk to a NPC, but some animation of them takes too long (like\neating, drinking, smoking) you can sometimes force them out of it by quickly\nunsheathing/sheathing your weapon.
\nWhen in the Old Camp: Baal Parvez can take you to the Sect Camp, he can be\nfound near the campfire near Fisk and Dexter.\nMordrag can take you to the New Camp, he can be found near the south gate,\nslightly after the campfire near Baal Parvez.
\nWhen you follow them and when they kill monsters then you also get the\nexperience.
\nThe NPC Wolf in the New Camp sells "The Bloodflies" book for 150 ore. When\nyou read this book you learn how to remove bloodflies parts (without having to\nspend learning points). After you read the book and learned its skill then you\ncan sell the book back for 75 ore. This investment quickly pays back: Per\nbloodfly: sting: 25 ore (unsold value), 2x wings (15 ore each unsold value).
\nThe templar Gor Na Drak (usually near the old mine and walks around with\nanother templar): talking to him teaches you how to learn to get secretion from\nminecrawlers for free.
\nThe spell scroll "Transform into bloodfly" is very useful:\n
Almost all mummies that are lootable in the game (Orc temple and The Sleeper\ntemple) have really good loot: permanent and regular potions and amulets and\nrings.
Skill investments:\n
Overall recommendation: I'd recommend a hybrid of melee/magic or melee/range.\nEarly game for melee: get max strength to 100 and get at least the first tier\nof one-handed training.
\nIn the later game focus more on ranged combat or learning the magic circles.
This describes an interesting side quest in the Gothic 1 game, which is not too\nobvious to find and may be overlooked.
\nThe first Chromanin book is found by defeating the skeleton mage in the Fog\nTower. On its bones you can find the Chromanin book. Reading the book starts\nthe Chromanin / The Stranger quest. The books contain some typos, being\ndemonicly possessed could be an excuse for that :)
\nNote that the Old books only spawn in a specific order after reading each found\nbook. So they have to be done in this specific order.
\nFog tower mage
\nLocation
\nMap
Text:
\n"He who is willing to\nrenounce all depravity\nand wanders on the path\nof righteousness, shall\nknow where the source\nof my power lies\nhidden. So that he might\nuse it to break the chains\nof this world and prove\nworthy to receive Chromanin."\n\n"The Wise One sees to\nhaving a general overview before he\ndedicates himself to his\nnext mission."\nThe clue is in the words "general overview" on the second page.\nOne of the highest points on the map is the tower where you find and free the orc Ur-Shak\nfrom being attacked by other orcs.
\nThe Wise One sees to having a general overview before he dedicates himself to\nhis next mission".
\nLocation: on top of the tower near where the orc Ur-Shak was.
\nItem: Old Book.
Text:
\n"Carried from the tides\nof time, Chromanin's\nvisions have opened my\neyes. No price could be\nhigh enough to ever\nrenounce my faith in\nthem, for it touched my\nheart too insensely."\n\n"What is devided will be\nreunited, after being\nmassively separated for\na short time."\nClue: "What is devided (sic) will be reunited, after being massively separated for a short time".\nLocation: small island near the (divided) river near the Old Camp.
\n\nText:
\n"Oh, Ancient Gods. How\ncan it be that a man like\nme, simple and unworthy,\nmay receive such great a\nlegacy. I feel great\nfear to lose all of it\nagain by a slight\nfaltering in word or\ndeed."\n\n"The wise fisherman\noccasionally tries to get\nlucky on the other side\nof the lake."\nClue: a fisherman lake and (partially sunken hut) can be found close the the entrance of the New Camp.\nAt the other side is the Old Book.
\n\nText:
\n"I dare not to be in\nthe presence of\nChromanin one day. Gone\nare the days of wasting\nand wailing. So easy it\nwill be to acheive\nabsolute perfection. I'm\nnot far from it!"\n\n"Long forgotten are the\ndeeds of those who once\nwere aboard."\nClue: "Long forgotten are the deeds of those who once were aboard."\nA broken ship can be found near the beach at the entrance of the Fog Tower.
\n\nText:
\n"But I shall not walk this\npath alone. This honor is\nmine. I must accept to\nshare the power within\nmyself with the worthy\nones who are to come and\nfind me. I hope they're\ncoming soon..."\n\n"You will find me where it all began."\nClue: "You will find me where it all began."\nVery obvious it is the same location as were the first book was found.
\n\nText:
\n"Empty pages"\nOn the corpse is the last chromanin book.\nWhen reading this last book the book is empty.\nThen there is evil laugh and 2 skeleton mages and skeleton minions will spawn.
\nHere are the texts in the quest log:
\nQuest log part 1
\nQuest log part 2
When you use the tips described above Gothic should be an easier game and you\nshould be able to get at a high(er) level with lots of mana/strength/hp.
\nHave fun!
html https://www.codemadness.org/gothic-1-guide.html Hiltjo
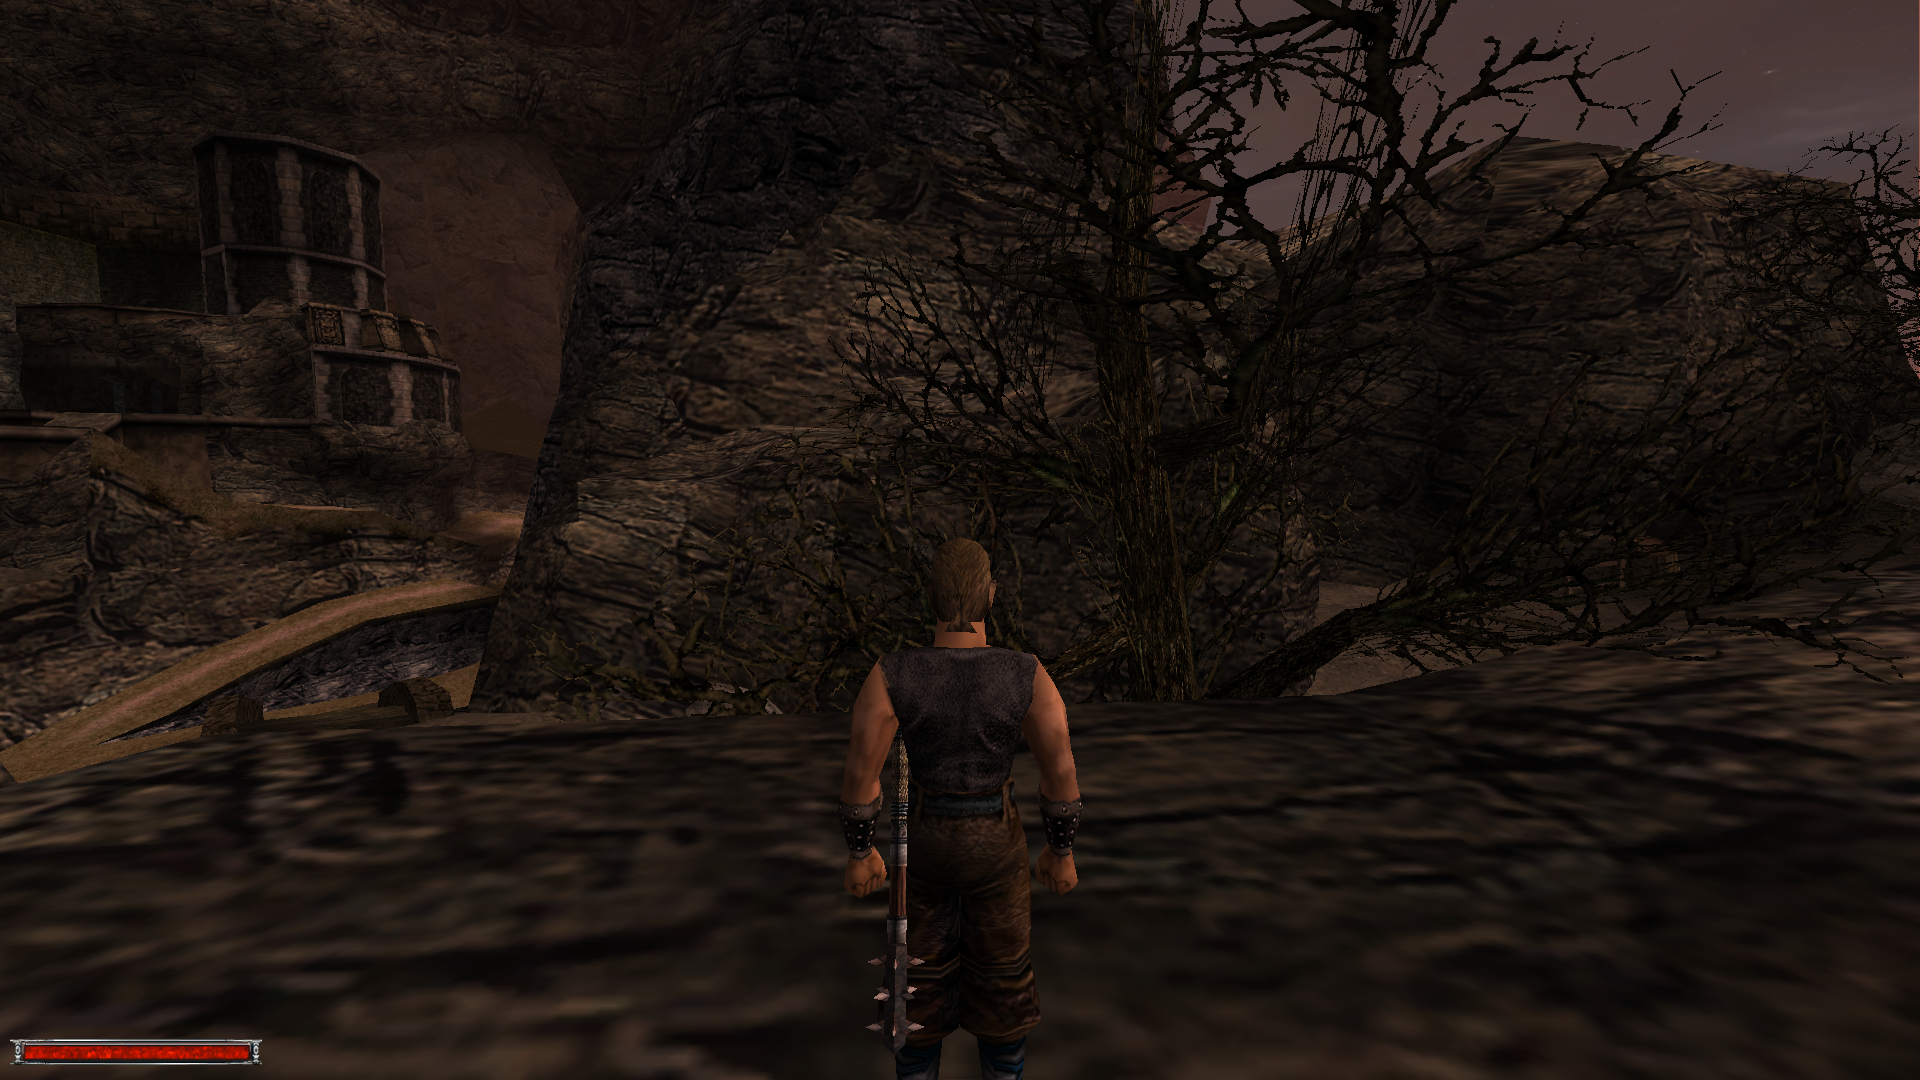
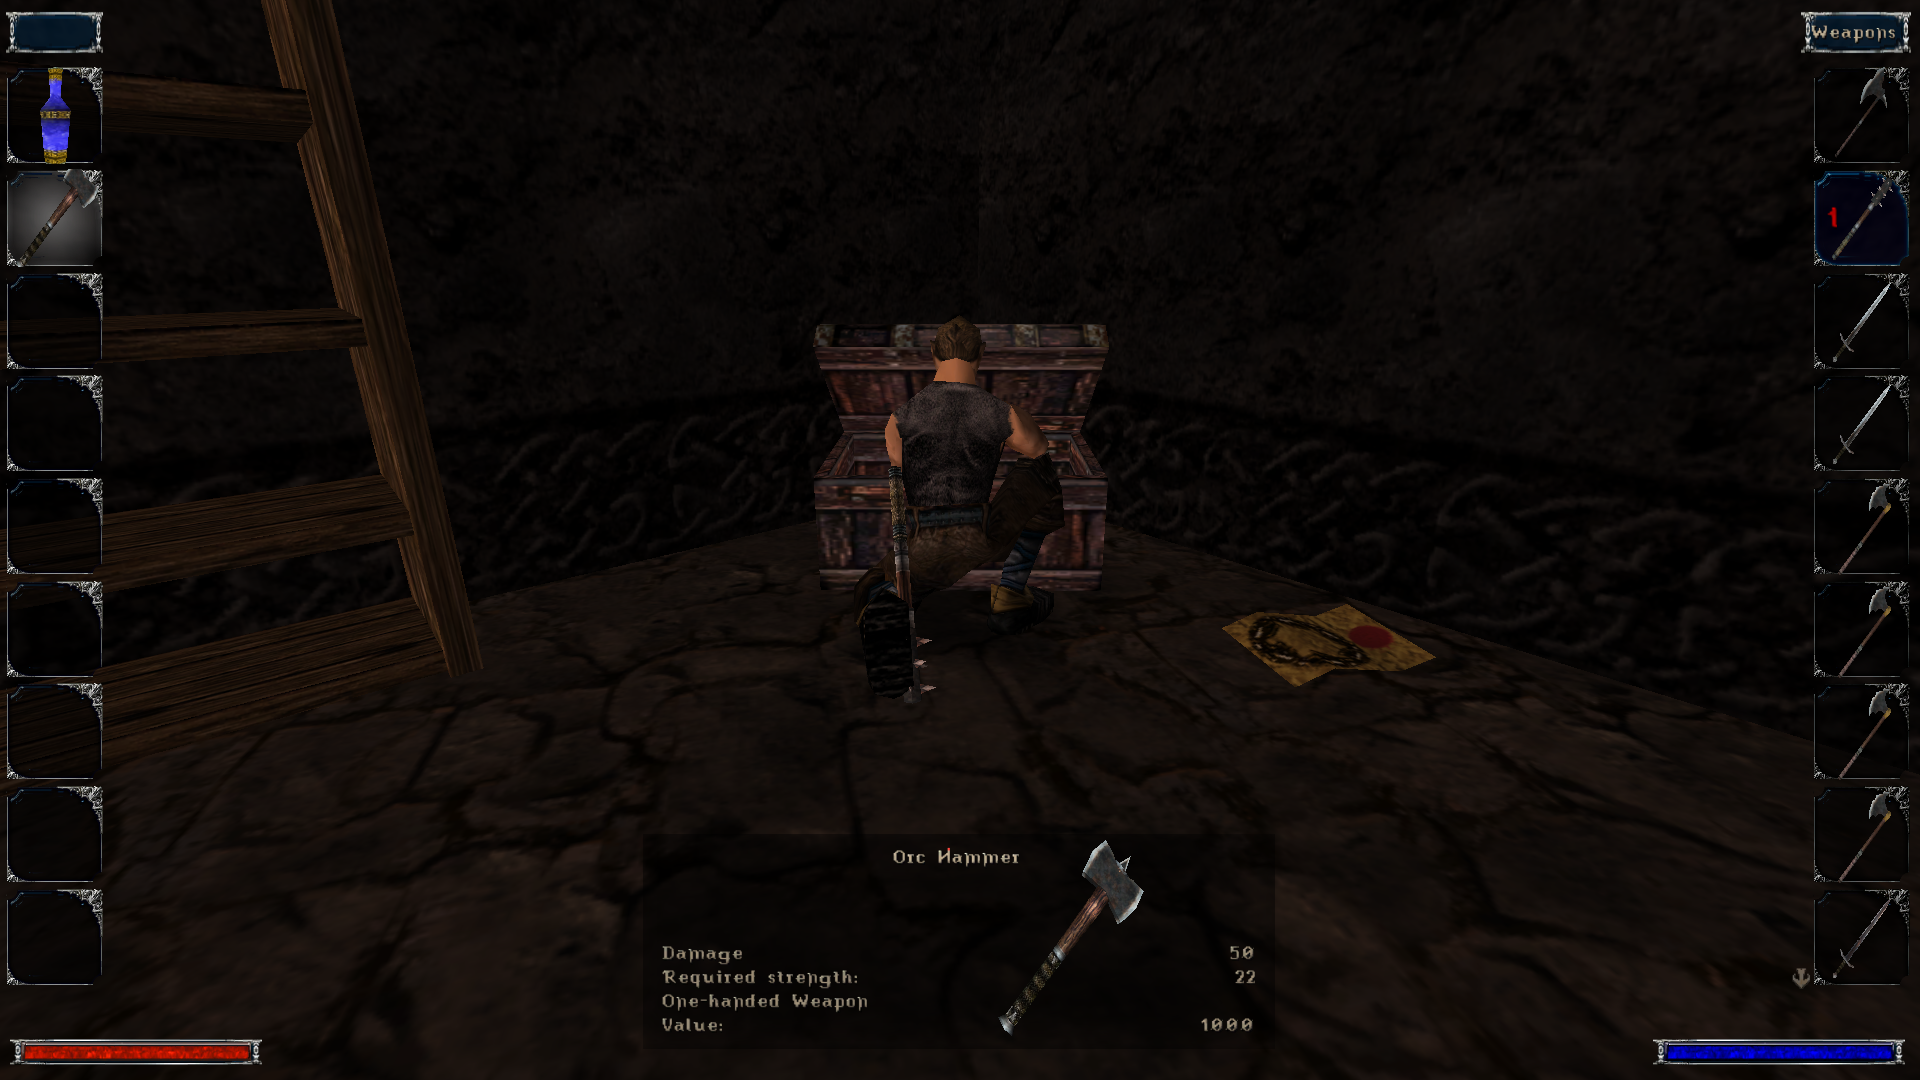
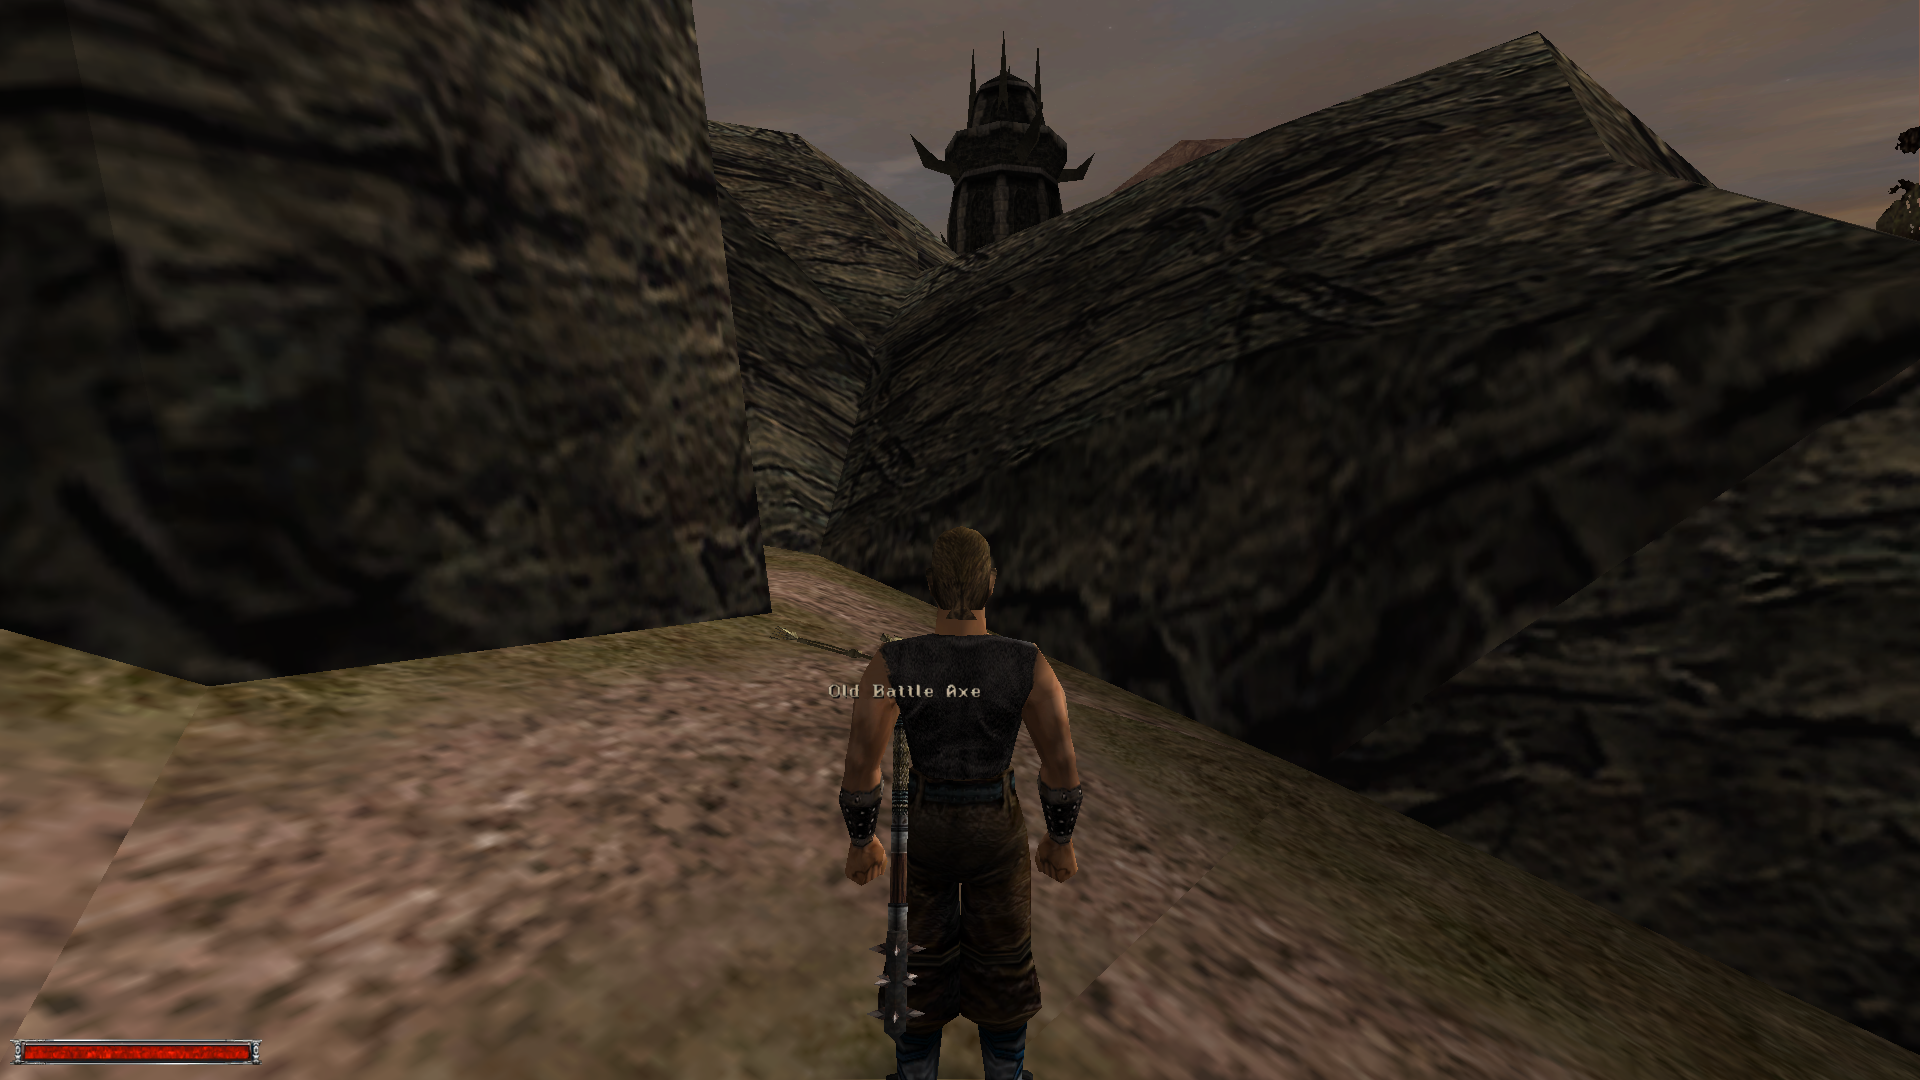
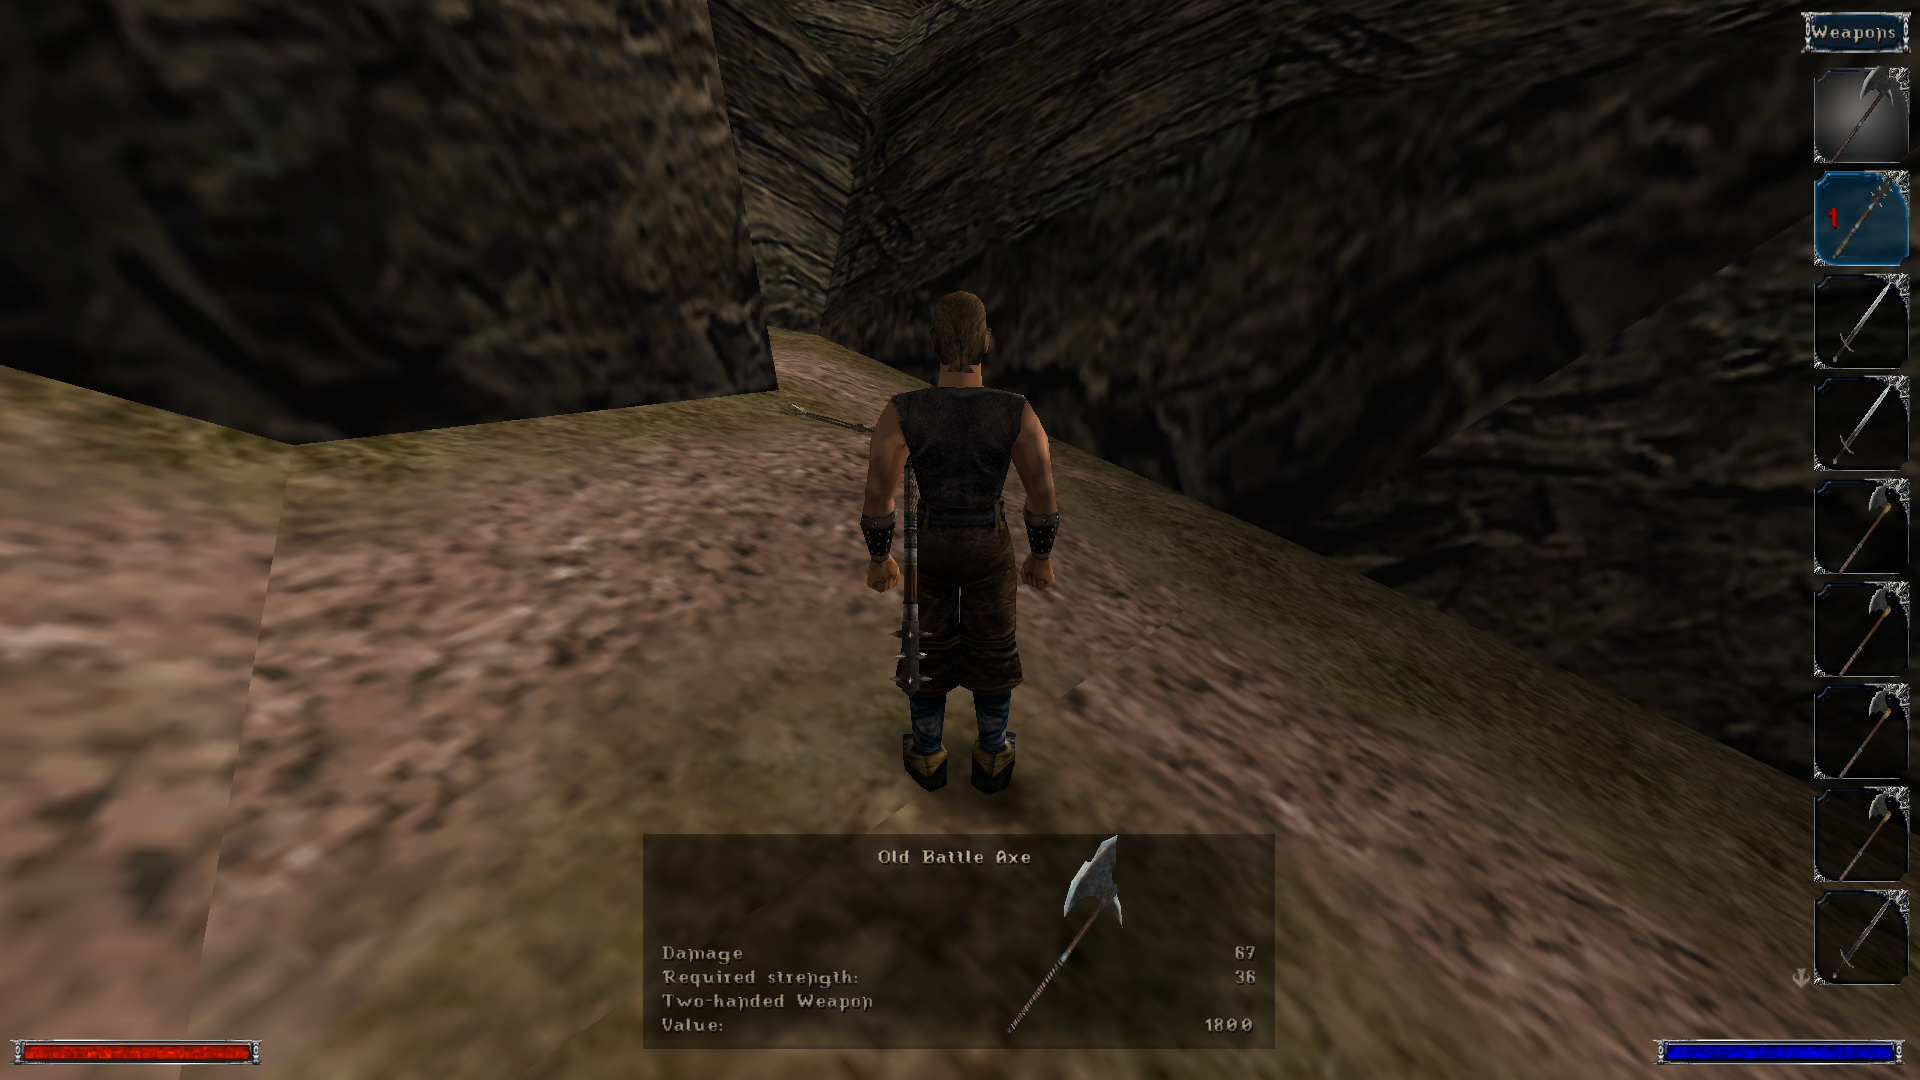
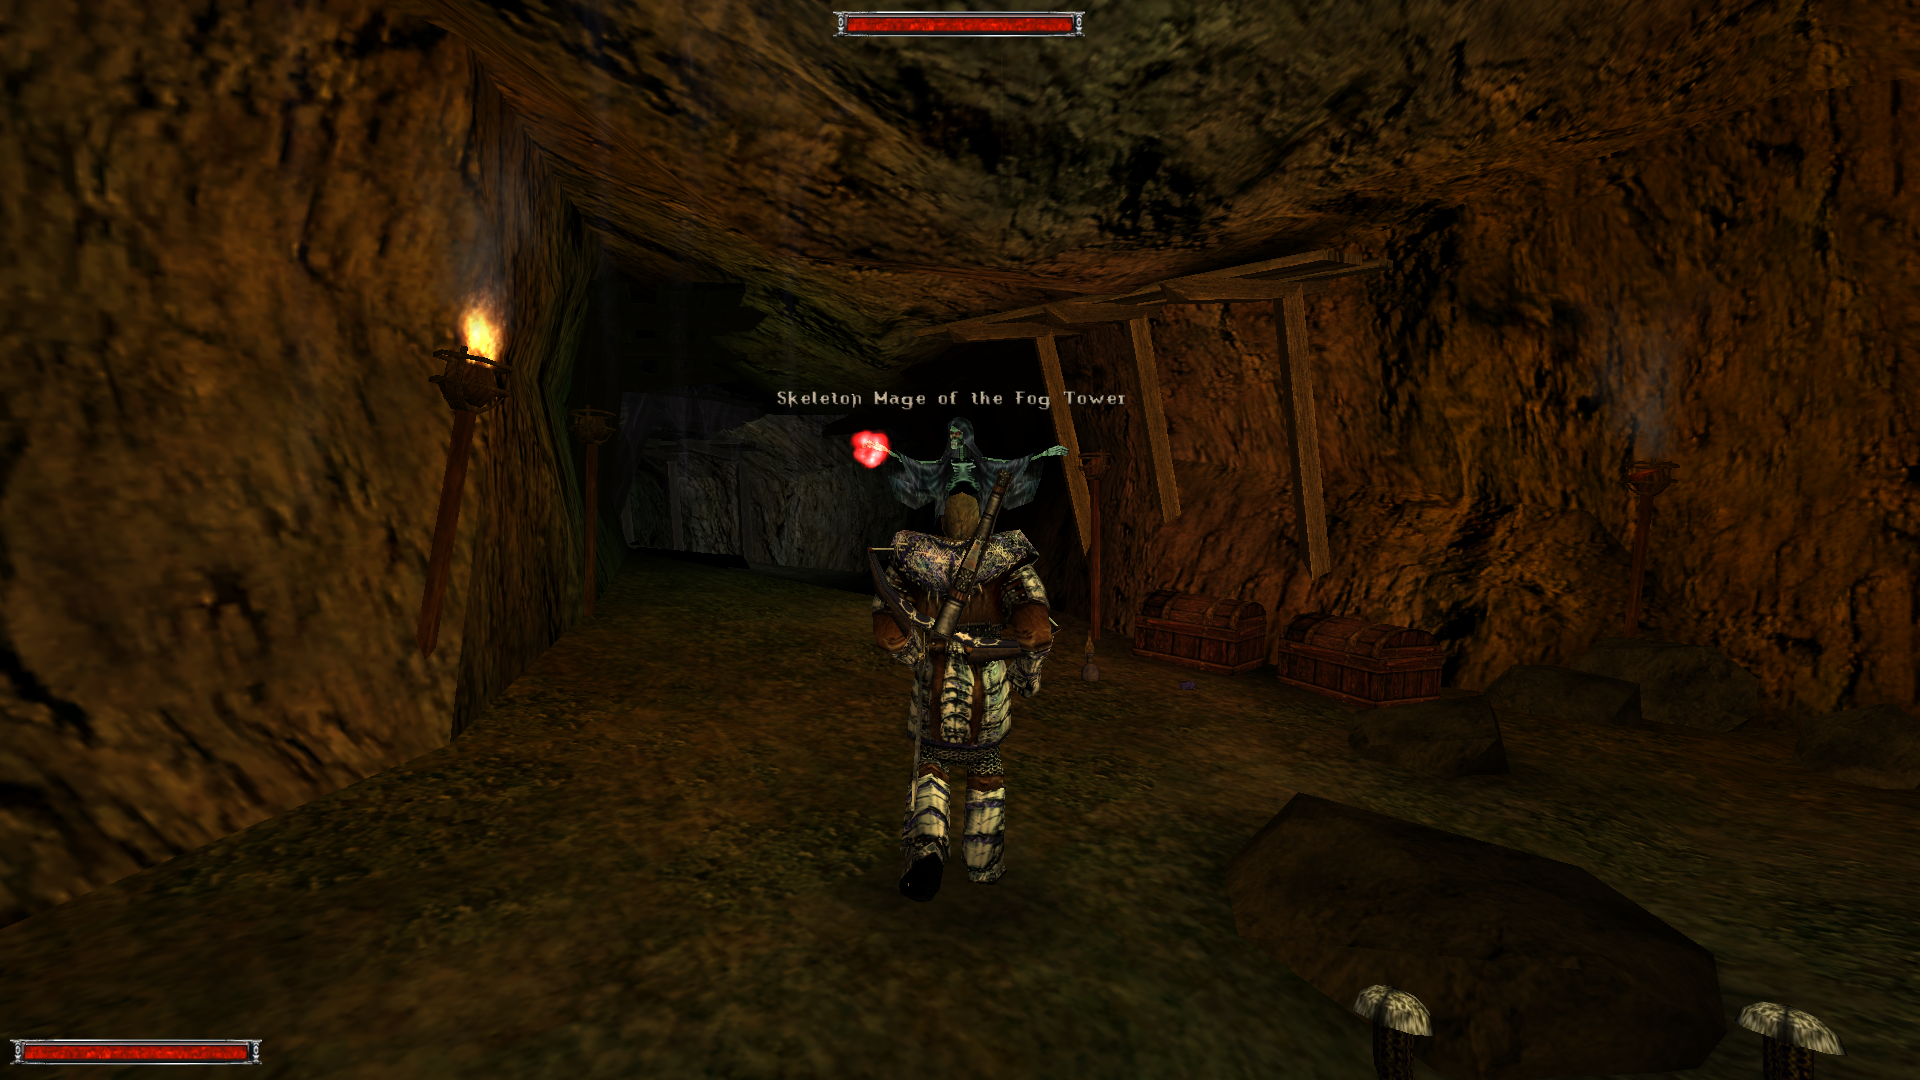
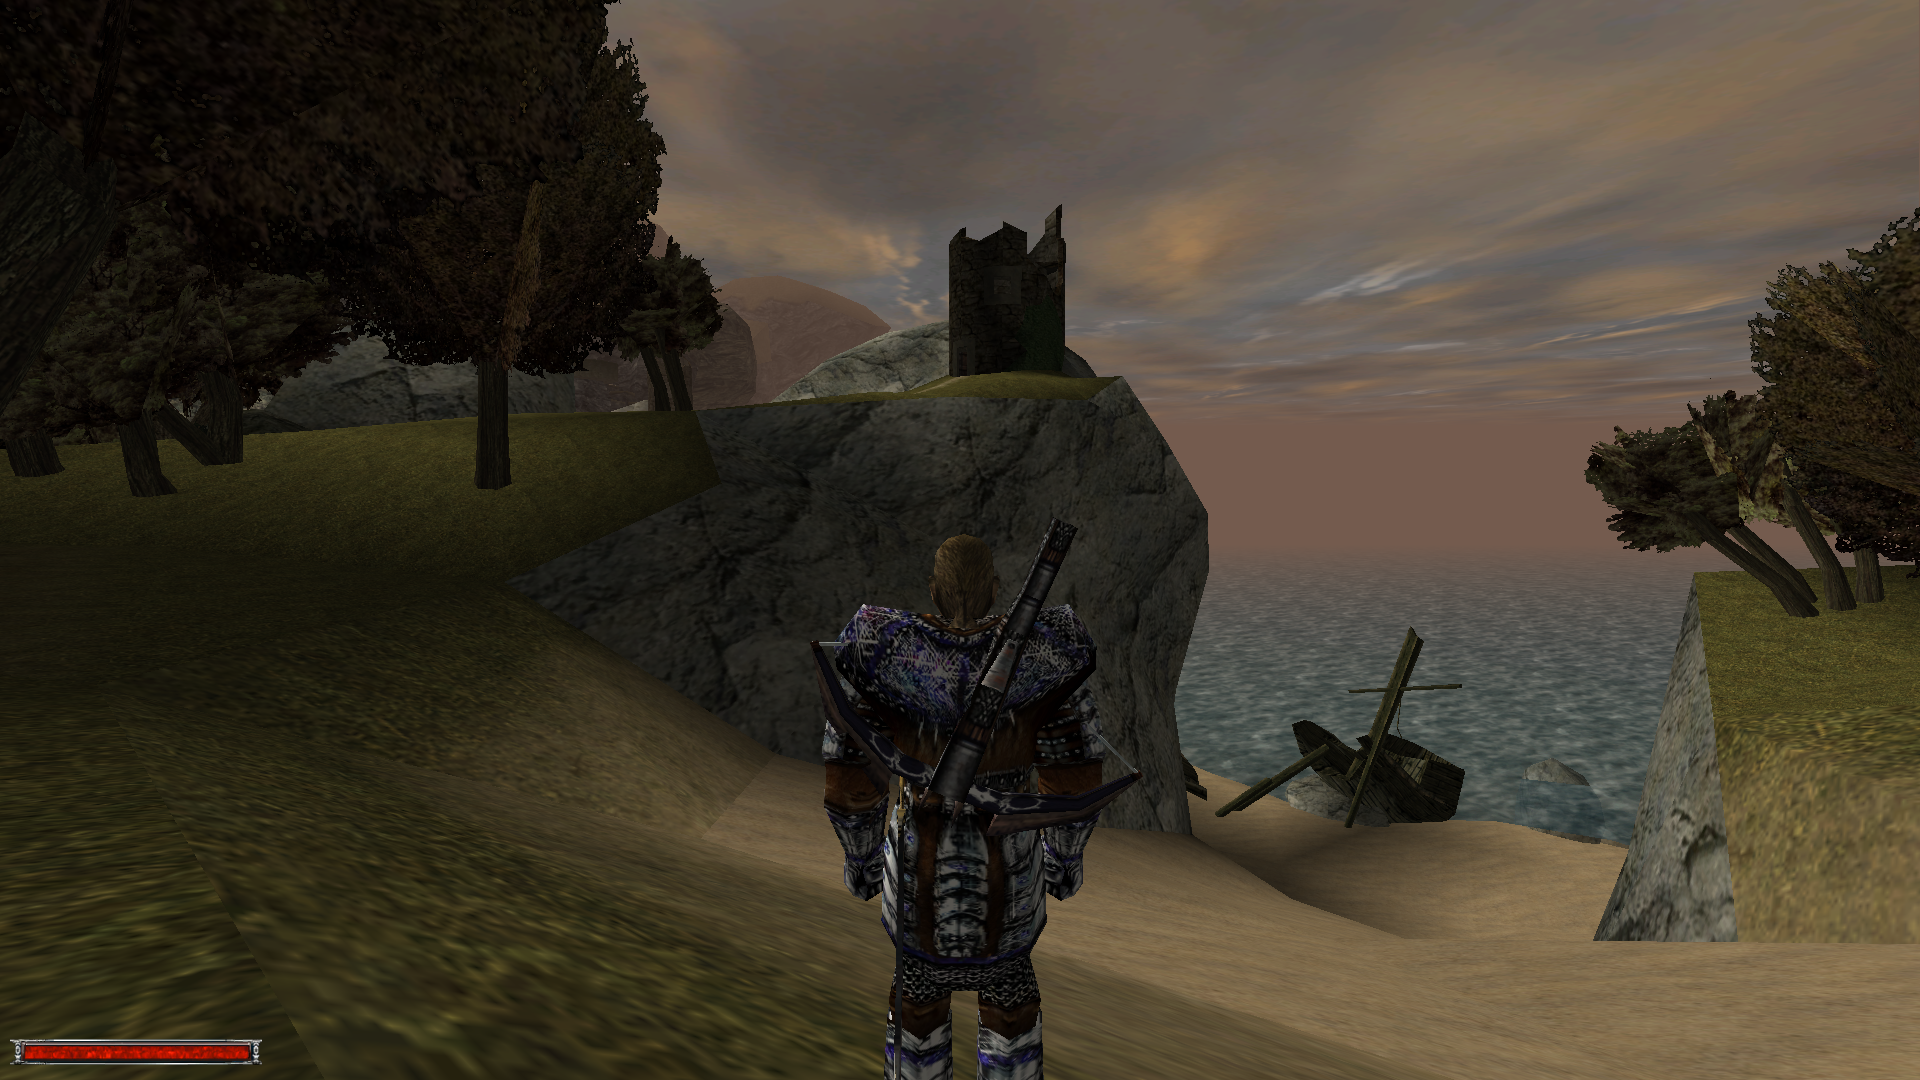
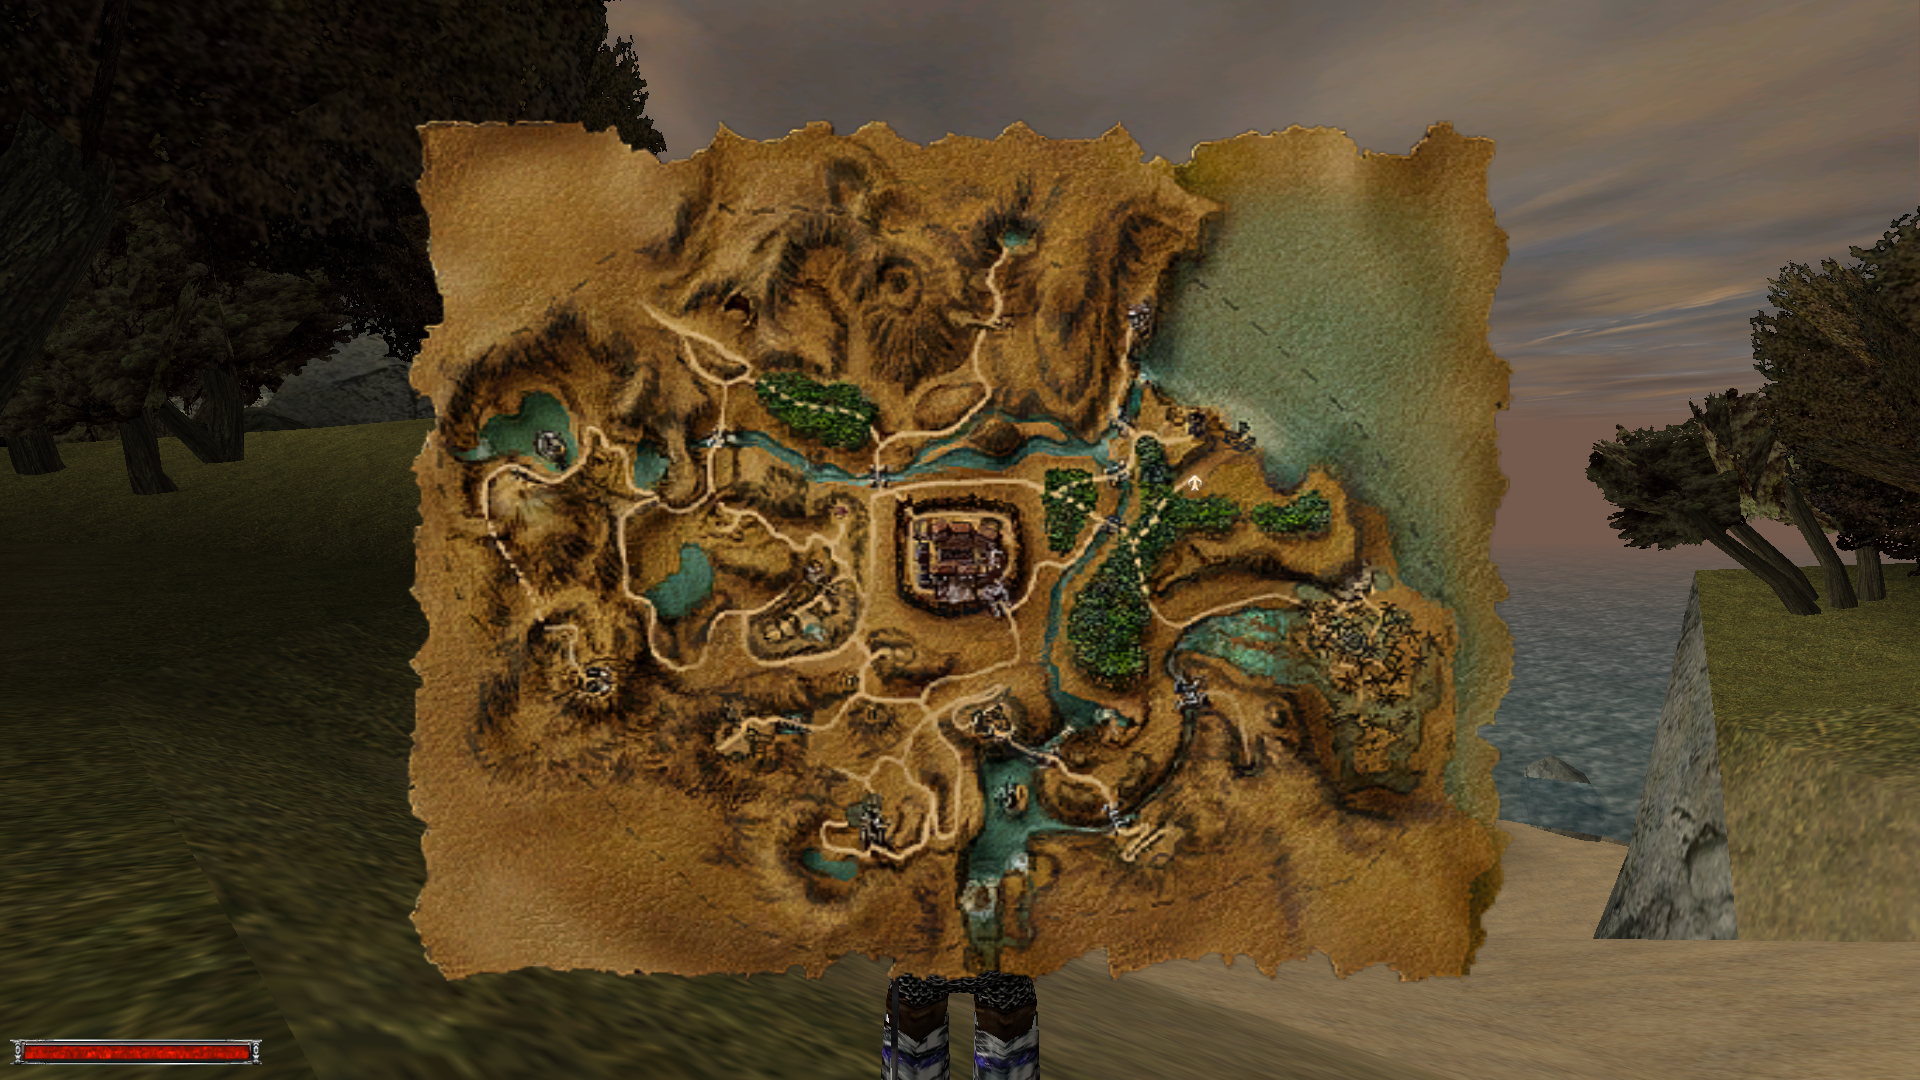
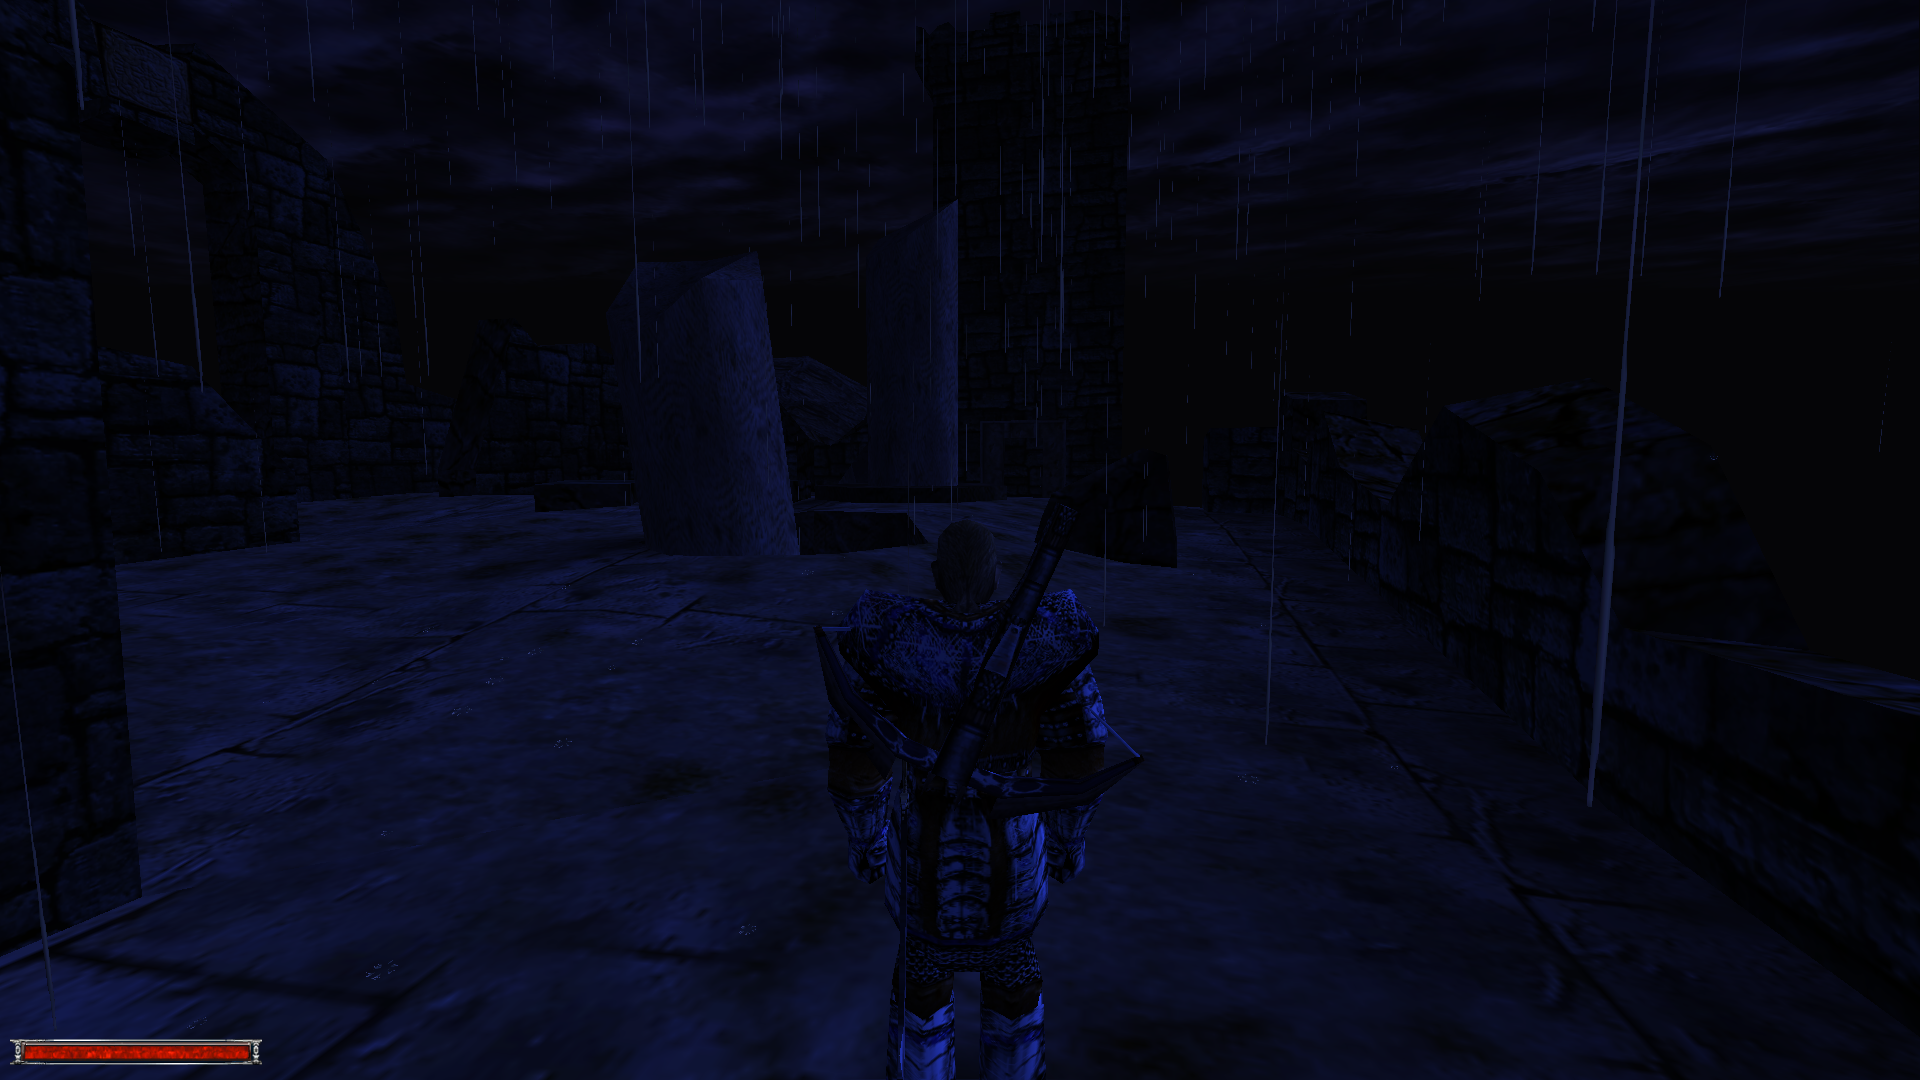
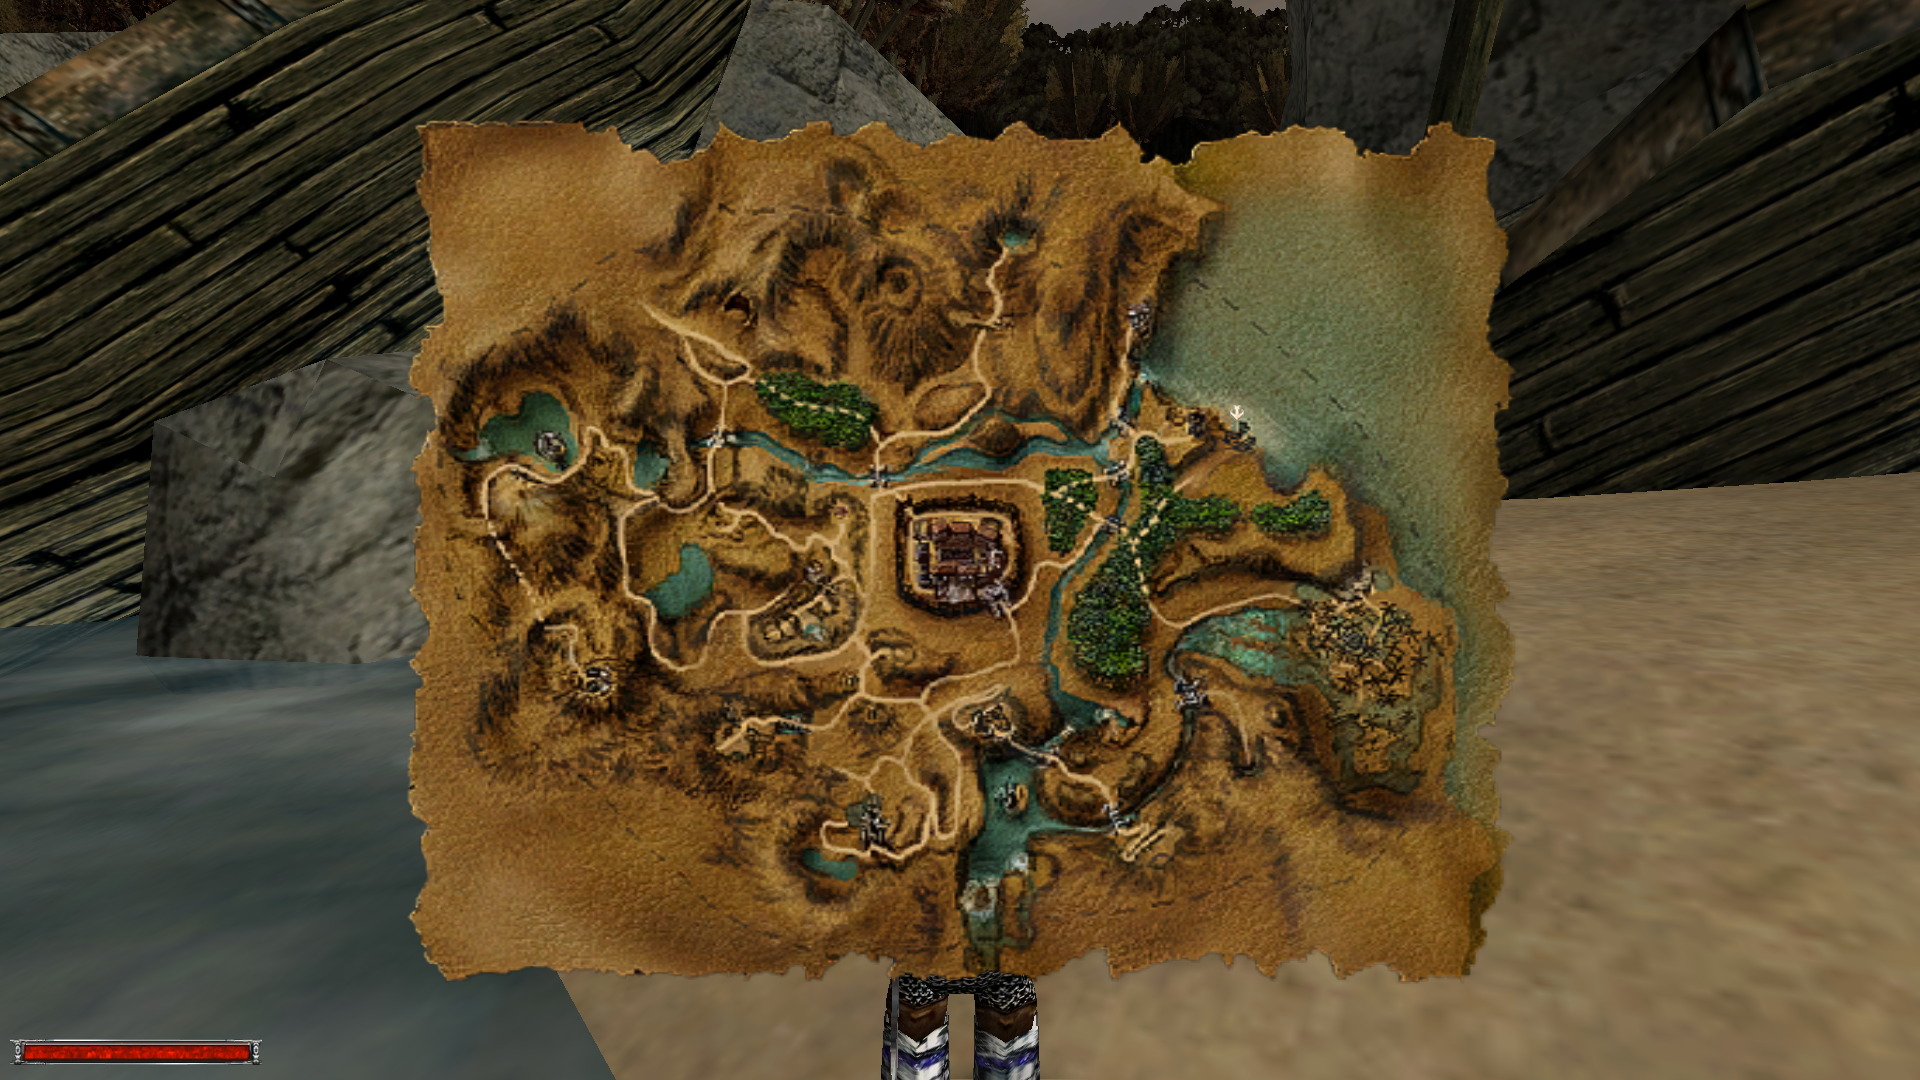